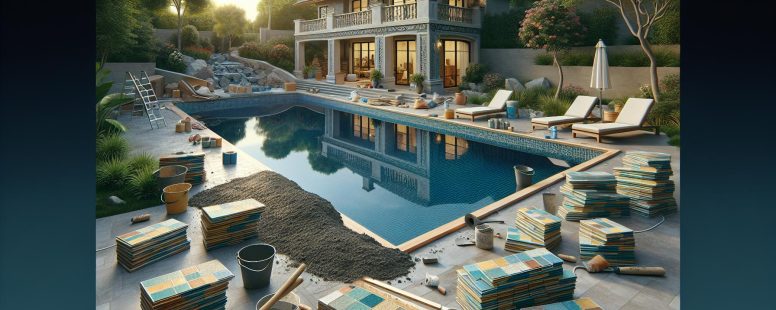
Ultimate Guide: When and How to Tile After Gunite for Durable Pool Construction
Understanding Gunite and Pool Construction
Diving into the pool of knowledge, let’s begin by shedding light on what gunite is and why it’s crucial in pool construction.
What Is Gunite?
Gunite, by definition, is a mixture of sand, cement, and water. It’s sprayed onto a stabilizing framework—usually a grid of steel bars, commonly known as rebar—to form a rigid structure. Its application isn’t confined to swimming pools alone; you’ll find its usage in a multitude of civil engineering projects, from bridges to tunnels. Why is it beloved by engineers, you ask? Well, the answer lies in its resilience and adaptability. For instance, gunite offers outstanding resistance against water penetration, a trait that’s incredibly important for structures submerged underwater. Also, it’s adaptable, providing builders the flexibility to shape it according to the required design, making it an ideal choice for customized pool shapes.
A concrete example would be the organic-shaped pools you see in high-end resorts. One could say that gunite is the unsung hero in the area of pool construction; offering durability, flexibility, and resilience in one go.
The Role of Gunite in Pool Building
In the process of building a swimming pool, layers upon layers of different materials come together to form the final structure. Preceding the application of gunite is the excavation process, where a hole of the planned pool size and shape is dug. Post the application of gunite; comes the curing phase. To ensure proper hardening, gunite needs ample time to cure—the recommended duration is about a week or so, depending on the weather condition.
Gunite, essentially, forms the shell of your pool and acts as a waterproof barrier, preventing leakage. But, it’s not just about utility. Aesthetics play an equal part. Tiling of the pool must follow after gunite has completely cured. That’s because the tiles — set in a layer of mortar — stick to the gunite. The correlation here is that premature tiling can lead to an uneven surface and even initiate cracking in the long run. The patience invested during this time of waiting can help create a visually appealing, as well as a long-lasting swimming pool. All in all, gunite sets the stage for the beauty and durability of your pool to shine through. A well-executed process can result in a brilliant outcome, an embodiment of both form and function. Hence understanding the role of gunite and its application process is essential to your pool building process.
The Process of Gunite Application
Diving into this section, let’s break down the specifics of gunite application in pool construction.
Stages of Gunite Application in Pool Construction
The application of gunite follows a step-by-step process, all closely knit to form a cohesive pool structure. Here’s what happens:
- Excavation: This initial step involves digging the ground to make way for your dream pool. The excavation’s shape and depth depend on the design and size of your planned pool.
- Framework: After excavation, steel bars get arranged in the dug-out pool, forming a frame. This reinforcing steel enhances the tensile strength of the gunite, reducing the likelihood of cracks and structural issues.
- Plumbing: Your pool’s plumbing should be installed at this stage. Pipes get positioned and pressurized to check for possible leaks before the gunite application.
- Gunite: Gunite is a mix of sand, cement, and water that’s sprayed under high pressure onto the steel framework. The workers shape and smooth the gunite to form your pool’s shell.
- Finishing: Once dry, any rough edges of the gunite are smoothed out.
To break it down, the stages leading to the application of gunite are excavation, framework erection, plumbing installation, and finally, the gunite application and finishing. Ensuring each stage is effectively achieved can save you from a pool with structural defects, so be sure to work with reputable pool builders.
Curing Time and Its Importance
After the gunite application, you might think it’s time to immerse; but, patience is key. This phase, called curing, is often overseen but plays an integral role in the strength and longevity of your pool.
Curing is a chemical process that continues, even after the gunite seems dry. During curing, hydration reactions result in the formation of crystals within the gunite mix. These crystals interlock tightly, resulting in a dense, impermeable layer, providing strength to the pool structure.
The ideal curing time for gunite is 28 days. This varies depending on climatic factors, but it’s crucial not to rush this process. Curing allows the gunite to achieve maximum hardness and tightness, preparing it for the next stage of pool finishing – tiling. Tiling too soon might lead to an uneven surface or cracks in the long run.
Armed with information about gunite application and the significance of its curing time, you’re one step closer to owning a perfect pool. Remember, patience pays off in achieving a strong, durable, and visually pleasing swimming pool.
The Right Time to Tile After Gunite
Optimal timing when adding tile after gunite application proves essential for ensuring the durability, functionality, and longevity of your swimming pool. Vest multiple factors influence this timing decision, with precise scheduling typically hinging on climate conditions, material quality, and curing time. For a successful pool project, understanding these variables serves as a necessary measure.
Factors Influencing Tiling After Gunite
Recognize that atmospheric conditions hold significant sway over when to tile post-gunite. As fresh gunite cures, it needs to stay hydrated, but the rate of evaporation pivots on temperatures and humidity levels. In hotter, drier climates, it’s worth spraying water on the new shell a few times daily to aid in the curing process. Critical, too, is the quality of the materials used during gunite application as this element plays a pivotal role in dictating when tiling can begin.
Expert Recommendations on Timeline
Boasting years of pool construction experience, experts suggest a gap of roughly 14 days from gunite application to when tiling initiates. This window allows for thorough curing of the pool shell, which, given it isn’t hurried, prevents issues such as cracks and uneven surfaces in due course.
But, with exceptions existing in particular circumstances, it’s recommended to consult with a professional. They’ll ponder your individual situation, including the specific materials and local environmental conditions, then provider a bespoke timeline for your tile application post-gunite. This tailored advice ensures the structural quality and longevity of your pool, granting you peace of mind alongside your ideal backyard oasis.
Preparing to Tile Post-Gunite
After learning the pivotal role of timing in pool construction and ensuring the adequate curing time of gunite for pool strength and longevity, it’s time to jump into the next steps. From here, we proceed to discuss the process of adding tiles post-gunite, guiding you through the necessary prep and materials needed to achieve a perfect result.
Required Materials and Tools for Tiling
When moving forward with your tiling project, gather all required materials beforehand. Notable among these materials include:
- Pool Tiles: These are specifically designed to resist pool water and provide a slip-resistant surface. Choose tiles conducive to your pool environment, taking into account their durability, aesthetics, and suitability to the anticipated water temperatures.
- Tile Adhesive: Specifically formulated for underwater application, tile adhesives are vital to affix your tiles securely onto the pool’s surface, ensuring they withstand water pressure over time.
- Grout: Specially formulated waterproof grout, capable of enduring pool water and chemicals, is crucial in filling spaces between tiles, and preventing water seepage.
- Spacers: Essential for maintaining uniform gaps between tiles, spacers aid proper water flow and grout application.
Your tool kit should contain a notched trowel for adhesive application, gloves for safety, tile cutters for fitting, sponge for excess grout removal, and grout floats to apply grout effortlessly.
Preparing the Surface for Tiling
Concrete pools, especially those made from gunite, call for a specific approach when it comes to tiling. The surface preparation goes a long way in determining the end result. Because your pool’s surface has to be clean, dry, and level to secure a good bond with the adhesive, pay close attention to this step.
Start by ensuring that the gunite has cured for at least 14 days, giving it ample time to strengthen and dry entirely. Next, clean the surface to remove dust, plaster, or any contaminants. Sometimes, this involves vigorous washing with a stiff brush and mild detergent, then a thorough rinse and thorough drying.
Following cleaning, check the surface for any necessary rectifications – any bulges, dents, or rough areas. These issues need addressing before tiling begins. Uneven or rough surfaces may require application of a thin layer of filler or smoothing compound to achieve the flat smooth surface that facilitates optimal tiling.
Once surface preparation is complete, you’re ready to proceed with tiling. Map out your tile pattern, evenly spreading the adhesive, laying the tiles carefully, and applying grout between tiles. Throughout this process, remember to consult a pool or tiling professional if doubts or complications arise.
Overall, it’s important to not rush the process. Patience, thorough preparation, and use of precise materials and methods contribute to a quality, long-lasting pool tiling outcome.
Conclusion
So, you’ve learned the importance of timing and patience in pool construction. After applying gunite, it’s crucial to let it cure for at least 14 days before proceeding with tiling. This waiting period ensures a strong, durable base for your tiles. Remember, the quality of your materials, including tiles, adhesive, grout, and spacers, can significantly impact the final result. Always prepare your gunite surface properly – it should be clean, dry, and level. Don’t rush the process; precision is key to a successful and lasting pool tiling job. And when in doubt, don’t hesitate to consult with professionals. Now that you’re armed with this knowledge, you’re ready to tackle your pool tiling project with confidence.
- When Is the Best Season for Dog Training in the US? Guide to Year-Round Success - November 5, 2025
- Why Choose an In-Ground Pool: Top Benefits for Your Home & Lifestyle - November 5, 2025
- Where Can I Advertise Driveway Cleaning Locally? Top Effective Spots to Reach Homeowners - November 5, 2025


