Ultimate Guide: How and Where to Replace Cedar Fence Boards
When your cedar fence starts showing signs of wear and tear, replacing boards becomes a necessary task to maintain its beauty and integrity. Cedar, known for its durability and resistance to decay, can still succumb to the elements or physical damage. You’re not just preserving a fence; you’re safeguarding your privacy and the aesthetic appeal of your outdoor space. Knowing how and where to replace cedar fence boards can save you time and money, ensuring your fence stands strong for years to come. Whether it’s a single board or several, understanding the right approach and materials needed is crucial for a seamless repair or replacement. Let’s jump into the essentials of keeping your cedar fence in top condition.
Why Replace Cedar Fence Boards?
When maintaining the overall look and function of your outdoor spaces, the state of your cedar fence can’t be overlooked. Cedar, known for its durability and resistance to decay, eventually succumbs to the elements and signs of wear. Here’s why replacing cedar fence boards becomes a necessity:
- Preserve Aesthetic Appeal: A well-maintained cedar fence enhances the curb appeal of your property. Replacing damaged or worn boards keeps it looking fresh and vibrant, preserving or potentially increasing your property’s value.
- Prevent Structural Failures: Over time, boards weaken and may pose a risk of collapsing. Regularly replacing compromised boards ensures the structural integrity of the fence, safeguarding against potential accidents or damage to your property.
- Cost Savings in the Long Run: Addressing issues early by replacing damaged boards can prevent more extensive, costly repairs down the road. Early intervention keeps the remainder of the fence in good condition, extending its overall lifespan.
- Improved Privacy and Security: Fences serve as physical barriers for your property. Replacing missing or severely damaged boards restores privacy and security, reinforcing the boundary against unwanted intrusions or prying eyes.
Identifying When to Replace Boards
Knowing when to replace cedar fence boards is as crucial as the replacement process itself. Be on the lookout for:
- Visible signs of rot or decay
- Cracks and splits that compromise the board’s strength
- Discoloration beyond what can be remedied with cleaning or staining
Where to Find Replacement Boards
Finding the right replacement boards is essential for maintaining the uniformity and integrity of your cedar fence. Consider sourcing from:
- Local lumberyards specializing in cedar products
- Home improvement stores with a wide selection of fencing materials
- Online retailers offering custom cuts and shipments diretly to your home
Understanding the nuances of why, when, and where to replace cedar fence boards empowers you to keep your fence in prime condition year-round. By staying vigilant and proactive, you ensure your cedar fence continues to serve its purpose while maintaining its beauty and structural integrity.
Signs of Damaged Boards
Identifying when your cedar fence boards need replacement is crucial for maintaining the integrity and aesthetics of your fence. Early detection can save you time and money while ensuring that your fence remains sturdy and visually appealing. Here are signs you should look out for:
- Cracks and Splits: Over time, weather conditions and natural wear can cause cedar boards to crack and split. Large cracks compromise the structural integrity of your fence.
- Rot: Cedar is naturally resistant to rot, but constant exposure to moisture can lead to decay. If the boards feel soft or crumble easily, it’s a sign of rot.
- Loose Boards: Boards that have started to come loose from the fence’s frame pose a security risk. They can easily be removed or fall out, which defeats the purpose of having a fence.
- Discoloration and Fading: While cedar naturally weathers to a silver-gray hue, uneven discoloration or noticeable fading could indicate damage or excessive moisture exposure.
- Insect Damage: Look out for holes or sawdust-like material around your fence boards. These are signs of insect infestations, such as termites, which can severely weaken the wood.
Spotting these signs early allows you to replace damaged boards before they affect more of your fence. Regular inspections, especially after severe weather conditions, can help you identify these issues. Replacing damaged cedar fence boards promptly ensures that your fence continues to provide privacy and security while maintaining its aesthetic appeal.
Tools and Materials Needed
Before you start the process of replacing cedar fence boards, it’s essential to gather all the necessary tools and materials. Having everything you need on hand will save you time and ensure a smooth and efficient repair process.
Essential Tools
- Hammer or Nail Gun: To remove old nails and secure new boards.
- Pry Bar: For carefully prying off damaged boards without causing further damage to your fence.
- Circular Saw: A must-have for cutting boards to the appropriate size.
- Level: To ensure your boards are perfectly vertical or horizontal, maintaining the integrity of the fence’s structure.
- Measuring Tape: Precision is key when replacing boards to fit specific spaces.
- Drill and Screw Bits: For fences that are screwed in, a drill will be necessary for removal and installation.
- Cedar Fence Boards: Ensure they match the size, style, and color of your existing fence for a seamless look.
- Galvanized Nails or Screws: These are resistant to rust and will help prolong the life of your fence.
- Wood Preservative: To treat any cut ends of new boards, protecting them from rot and insects.
- Paint or Stain: If your fence is painted or stained, you’ll need matching finish to apply to your new boards after installation.
Remember, the quality of both tools and materials can significantly impact the longevity and appearance of your fence. Investing in high-quality cedar and the right tools for the job will ensure your fence remains beautiful and sturdy for years to come.
Assessing the Damage
Before you jump into replacing your cedar fence boards, it’s crucial to assess the extent of the damage thoroughly. Whether it’s natural wear and tear or specific incidents that led to the damage, understanding what you’re dealing with will guide your replacement strategy.
Identify the Affected Areas
Start by walking along the entirety of your fence, both inside and out, and take note of any boards that are visibly damaged. Damaged boards might display:
- Cracks that compromise the integrity of the wood
- Rot, often caused by prolonged exposure to moisture
- Loose boards that no longer adhere to the fence’s framework
- Discoloration, which could point to deeper issues like mold or mildew
- Insect damage, indicated by holes or sawdust around the wood
Assess the Severity
Once you’ve identified the damaged boards, assess the severity of each. This step is vital as not all damage necessitates a full board replacement. For instance:
- Minor cracks or discoloration might only require surface treatments.
- Loose boards could be resecured rather than replaced if the wood remains in good condition.
- Rot and insect damage generally indicate that a replacement is necessary.
Tools for Assessment
For a thorough assessment, you might need some tools to inspect the damage closely:
- A screwdriver or similar tool can help test for soft, rotting wood by gently pressing into the wood’s surface. If the tool easily penetrates the wood, replacement is necessary.
- A flashlight can aid in spotting less visible signs of insects or internal rot, especially in crevices.
Understanding the extent and severity of the damage is essential for planning your replacement project efficiently. It ensures you only replace what’s necessary, saving time and resources in the long run.
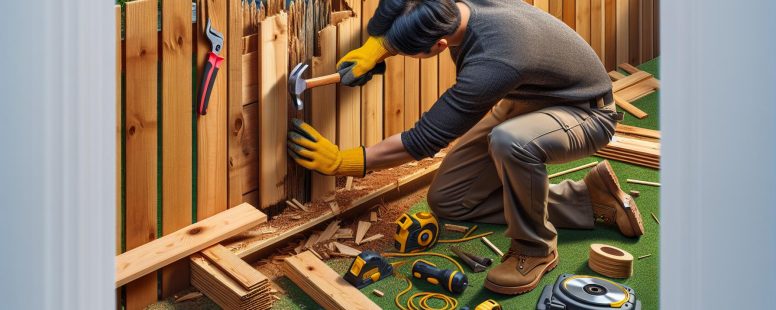
Removing the Old Boards
When you’re ready to replace your cedar fence boards, the first crucial step is removing the old, damaged ones efficiently. This process, while straightforward, requires some attention to detail to avoid damaging the remaining structure.
Safety First: Before starting, ensure you’re equipped with safety glasses and gloves. You’ll be dealing with wood potentially splintered, nails, or screws that could cause injury.
Identifying Boards for Removal: Not every board might need replacement. Inspect your fence carefully, marking the boards that exhibit signs of damage, such as cracks, rot, or significant discoloration. This targeted approach saves time and preserves the integrity of your fence.
Tools You’ll Need: Gather the necessary tools for this task. A hammer, pry bar, and saw (hand saw or circular saw for more significant sections) are essential. You might also need a drill if you plan to unscrew any fasteners.
- Pry Bar: Use this to gently pry the damaged board away from the supporting rails.
- Hammer: A hammer can help you remove any nails or apply force where needed carefully.
- Saw: For boards that are severely damaged or difficult to remove, cutting them out might be the easiest solution.
Proceed With Caution: Start at one end of the damaged board, carefully prying it away from the fence rail. If the wood or nails show resistance, do not force it. Instead, consider cutting around the stubborn area to avoid exerting excess pressure on the surrounding structure.
Dealing With Fasteners: Once the board is partially detached, assess whether it’s held in place by nails or screws. If it’s nails, you might be able to pull them out with the back of your hammer or a nail puller. For screws, use a drill or screwdriver. Remember to preserve any undamaged fasteners for reuse.
Finishing Touches: After removing the board, examine the area for any remaining pieces of wood or fasteners. Clean the space thoroughly to ensure a smooth installation of the new cedar board. This attention to detail ensures that your fence remains sturdy and visually appealing.
With the old boards removed, you’re now ready to prepare the surrounding area for the new cedar fence boards. Proper preparation is key to ensuring a successful and durable installation, maintaining the aesthetic and structural integrity of your fence for years to come.
Choosing New Boards
When it’s time to replace your cedar fence boards, selecting the right replacements is vital for durability and aesthetics. The process involves understanding the types of cedar, board sizes, and quality markers. High-quality cedar boards will ensure your fence remains sturdy and visually appealing for years to come.
Understand the Types of Cedar
First, know that there are several types of cedar, including Western Red, Eastern White, and Northern White Cedar. Western Red Cedar is renowned for its durability and resistance to decay and insects, making it an ideal choice for outdoor fence boards. Eastern and Northern White Cedars also offer good durability but are slightly less resistant to decay than Western Red.
Board Sizes and Their Uses
Cedar fence boards come in various sizes and styles. The most common thicknesses are 1/2-inch, 5/8-inch, and 1-inch, with widths usually ranging from 3 to 8 inches. The choice of size will depend on your fence’s design and the level of privacy you desire. For a tighter, more private fence, choose wider boards. For a decorative, open look, narrower boards are preferable.
Look for Quality Markers
When selecting new boards, pay close attention to their appearance. Quality cedar boards should be:
- Free of large knots or cracks
- Uniform in color
- Smooth and free of splits
Opt for boards that are pre-treated with a water-repellant or a stain that matches your existing fence. This enhances their longevity and helps maintain a cohesive appearance.
Source Responsibly
Where you buy your cedar boards matters. Local lumber yards often provide high-quality, ethically sourced cedar. They’re also a great resource for finding boards that match the style and color of your existing fence. Remember, investing in quality materials from reputable sources guarantees your fence’s beauty and structural integrity for years to come.
By understanding the types of cedar, board sizes, quality markers, and sourcing responsibly, you’re well-equipped to choose new cedar boards that will rejuvenate your fence and enhance your outdoor space.
Installing New Boards
When you’re ready to install new cedar boards for your fence, following the right process is crucial to ensure a sturdy and visually appealing outcome. After removing the damaged boards and preparing your workspace, it’s time to move on to the crucial steps of installation.
First, measure the spaces where new boards will go to ensure you cut your new cedar to the right length. Accurate measurements prevent waste and ensure a seamless fit with the existing fence structure. Always measure twice, cut once to minimize errors.
Next, treat the ends of your new boards with a wood preservative before installation. This extra step significantly extends the life of your cedar boards by protecting them from rot, mold, and insect damage, which are common issues affecting wood fences.
Then, align your new cedar boards with the existing fence structure. Starting from one end, use your level to ensure the board is perfectly vertical or matches the desired angle of your fence design. This step is critical for maintaining the structural integrity and aesthetic appeal of the fence.
Secure the boards in place using galvanized nails or screws. Using corrosion-resistant fasteners is vital to prevent rust that can stain your cedar boards. For the best results, space nails or screws evenly and drive them in at a consistent depth, ensuring a tight fit that won’t loosen over time.
Finally, apply a coat of paint or stain that matches your existing fence, if necessary. This not only helps the new boards blend in with the rest but also adds an extra layer of protection against weather elements. Pay special attention to the end grains, as they absorb more of the product and are more prone to damage.
By carefully selecting your replacement cedar boards, preparing them properly, and following these installation steps, you’ll rejuvenate your fence’s appearance and functionality, enhancing your outdoor space’s overall beauty and privacy.
Finishing Touches
After you’ve successfully replaced the cedar fence boards and ensured they’re securely attached, it’s time to focus on the finishing touches that will extend the life of your fence and enhance its appearance. These steps are crucial for maintaining the aesthetics and durability of your cedar fence.
First, seal and protect the wood. Cedar is naturally resistant to decay, but applying a high-quality sealant will help preserve its color and protect it against harsh weather conditions and UV rays. For best results, choose a sealant specifically designed for cedar wood. Apply the sealant using a brush or sprayer according to the manufacturer’s instructions. This will not only enhance the natural beauty of the cedar but also add years to your fence’s lifespan.
Next, address gaps and spaces that may have appeared during the installation of the new boards. Cedar wood can expand or contract depending on the weather, so it’s important to check the spacing between boards after a few weeks and adjust if necessary. Proper spacing ensures good ventilation and prevents moisture buildup, which can lead to wood rot.
Inspect and adjust fasteners as needed. Over time, nails or screws may become loose due to the natural movement of the wood. Periodically check the fasteners and tighten them to ensure the boards remain securely in place. Using galvanized nails or screws will prevent rust and corrosion, adding to the longevity of your fence.
Finally, consider applying a stain or paint to give your fence a fresh look. Staining can accentuate the natural grain of the cedar, while painting allows for a more customized color scheme. Whichever option you choose, make sure the product is suitable for outdoor use and compatible with cedar wood. Applying a coat of paint or stain every few years will not only beautify your fence but also add an extra layer of protection against the elements.
By following these finishing touches, you’ll ensure your cedar fence remains sturdy, beautiful, and durable for years to come.
Where to Purchase Cedar Fence Boards
When it’s time to replace or repair your cedar fence, knowing where to purchase high-quality cedar fence boards is crucial. The right choice ensures not only the beauty and longevity of your fence but also supports sustainable practices. Here’s how and where to find the best cedar for your fencing project.
Local Lumber Yards
Firstly, local lumber yards are often your best bet for sourcing cedar fence boards. They tend to have a good variety of high-quality cedar that’s suitable for fencing. More importantly, they can offer valuable advice on the best type of cedar for your specific project. Local yards often source their materials responsibly, which is a plus for the environmentally conscious.
- Pros:
- Expert advice available
- Likely to carry high-quality, sustainably sourced cedar
- Can match existing fence styles and colors
Big Box Home Improvement Stores
Big box stores like Home Depot or Lowe’s are convenient options where you can find cedar fence boards. They often have a range of sizes and types, including pre-treated and finished boards.
- Pros:
- Wide availability
- Variety in types and sizes
- Online and in-store shopping options
Online Retailers
Another option is purchasing cedar fence boards through online retailers. This can be a great way to compare prices and types of cedar from the comfort of your home. Some online platforms specialize in lumber and offer delivery, making this a convenient option if transportation is an issue.
- Pros:
- Convenient shopping from home
- Delivery options available
- Ability to easily compare prices
Specialty Lumber Stores
For those looking for the highest quality or specific types of cedar, specialty lumber stores are the place to go. These stores focus exclusively on wood and can often source rare or premium cedar boards not found elsewhere.
- Pros:
- Access to premium and rare types of cedar
- Highly knowledgeable staff
- Specialized products for fencing
When selecting where to purchase your cedar fence boards, consider not only the price and convenience but also the quality of the cedar and the sustainability of its sourcing. Investing in high-quality cedar from reputable sources ensures your fence will look great and last for years to come.
Conclusion
Replacing cedar fence boards isn’t just about maintaining privacy and security; it’s also about preserving the beauty and longevity of your outdoor space. With the right approach, materials, and tools, you can ensure your fence remains in top condition. Remember, early detection and regular inspections are key to identifying when replacements are needed. By following the step-by-step guide provided, from assessing damage to the final touches of sealing and staining, you’ll save time and resources while achieving a durable and aesthetically pleasing fence. Don’t forget to invest in high-quality cedar and purchase from reputable sources to guarantee the best outcome. Your fence is not only a boundary but a reflection of your home’s appeal—treat it with care.

- When Is Peak Season for Hot Tub Rentals in the US? Find Out Best Times to Book - November 10, 2025
- Where Can I Market My Yard Game Rentals? Top Strategies to Boost Your Business - November 10, 2025
- Why Is Microgreens Farming Popular for Small Spaces? Top Benefits Explained - November 9, 2025