How Do I Install an Outdoor Kitchen? Step-by-Step Guide for a Perfect Backyard Setup
Picture stepping outside to the aroma of sizzling steaks and fresh herbs, the warm glow of a fire pit lighting up your evening. An outdoor kitchen transforms your backyard into a vibrant hub where flavors come alive and memories are made. But how do you bring this dream to life with your own hands?
Installing an outdoor kitchen isn’t just about placing a grill outside. It’s about crafting a seamless blend of function and style that fits your space and lifestyle. From choosing the right materials to planning utilities, every step shapes your culinary oasis. Ready to turn your backyard into the ultimate gathering spot? Let’s explore how to install an outdoor kitchen that’s as inviting as it is impressive.
Understanding the Basics of an Outdoor Kitchen
Creating an outdoor kitchen starts by knowing the essential building blocks. You shape a space that not only serves as a cooking station but also becomes the heart of outdoor entertainment.
Key Components of an Outdoor Kitchen
An outdoor kitchen typically includes several core elements that must work together seamlessly:
- Cooking Appliances: Grills, smokers, and cooktops form the foundation. For example, a stainless-steel gas grill offers durability and consistent heat.
- Countertops and Prep Areas: Durable surfaces like granite or concrete provide prep space and withstand weather conditions.
- Storage Solutions: Weatherproof cabinets and drawers keep utensils, dishes, and condiments handy.
- Utilities and Plumbing: Gas lines, electrical outlets, and water supply equip the kitchen for versatility. Picture running water right by the grill for easy cleaning—it’s convenience at its best.
- Seating and Dining Space: Incorporate bar stools or a dining table to encourage gathering and socializing.
Every component interacts like parts of a complex machine; if one element lacks, the whole system’s functionality suffers. Choosing materials that resist outdoor elements ensures your kitchen retains form and function through seasons. Are you pondering whether to include a pizza oven or a beverage cooler? Consider your hosting frequency and cooking style before deciding.
Benefits of Installing an Outdoor Kitchen
Installing an outdoor kitchen delivers numerous benefits, transforming your backyard experience and home value:
- Enhances Entertaining: Outdoor kitchens let you socialize while cooking, keeping the chef part of the conversation instead of isolated indoors.
- Increases Home Value: According to Remodeling Magazine’s 2023 Cost vs. Value report, outdoor kitchen installations recover up to 70% of their costs during resale.
- Improves Cooking Variety: Open flames, smokers, and grills open avenues for recipes that indoor kitchens can’t easily replicate — like smoked brisket or wood-fired pizzas.
- Promotes Healthier Cooking: Grilling allows excess fats to drip away, helping create lighter meals.
- Encourages Outdoor Living: Extending use of your backyard encourages more time outside, creating memorable moments in fresh air.
But, take note installing an outdoor kitchen requires a commitment to maintenance and may involve permits from local authorities. Weigh these considerations carefully to match your lifestyle and budget.
Exploring these basics creates a clear roadmap for your project. You design a functional space by aligning components that complement your cooking habits and outdoor life. Want to start turning your backyard into a culinary oasis? Begin by outlining these essentials and imagining how each piece would fit into your ideal outdoor kitchen.
Planning Your Outdoor Kitchen Installation
Planning your outdoor kitchen installation lays the groundwork for a seamless cooking and entertaining experience. Thorough preparation improves functionality and ensures your space matches your lifestyle.
Choosing the Right Location
Location governs your outdoor kitchen’s success. Position it near your indoor kitchen for convenience without compromising the flow of your backyard. Consider sun exposure: placing the kitchen in partial shade reduces heat buildup and prolongs appliance life. Accessibility to utilities like water, electricity, and gas lines sharply cuts installation time and costs. Keep in mind safety and local regulations, ensuring your setup stays compliant. Picture hosting a summer barbecue where the cook isn’t stuck away from guests—strategic placement makes that possible.
Determining Your Budget and Design
Budgeting defines your design choices. Allocate funds for appliances, countertops, cabinetry, shelter, and labor, but leave room for unexpected fees or upgrades. Design balance matters: prioritize elements you use most, like a grill or smoker, and scale back on less critical features. For example, a compact setup with a high-end grill can deliver more value than a sprawling kitchen with basic equipment. Multiple viewpoints exist about splurging on luxury appliances versus functional essentials; weigh your goals carefully. Visualize your perfect outdoor room to guide practical budgeting decisions.
Selecting Materials and Appliances
Material choice affects durability and style. Weather-resistant materials including stainless steel, stone, and sealed concrete withstand outdoor elements effectively. Countertops made of granite or concrete offer both strength and aesthetics. Appliances range from built-in grills, pizza ovens, to refrigeration units—select those that fit your cooking habits. Think about maintenance demands; stainless steel might smudge but resists rust, granite looks timeless but can chip. Different materials also influence the overall vibe, from modern sleekness to rustic charm. Choose wisely for longevity and visual appeal.
| Aspect | Recommended Options | Considerations |
|---|---|---|
| Location | Near indoor kitchen, shaded spots | Access to utilities, local codes |
| Budget | Set clear allocation, allow buffer | Prioritize needs, trim extras |
| Materials | Stainless steel, granite, concrete | Durability, maintenance, style |
| Appliances | Grill, smoker, fridge, pizza oven | Usage habits, upkeep, space requirements |
Meticulously planning your outdoor kitchen installation translates visions into a useable and enjoyable space. With smart choices in location, budget, materials, and appliances, your backyard transforms into the ultimate culinary haven. What part excites you most to customize? Let that drive your decisions for a kitchen designed just for you.
Step-by-Step Guide: How Do I Install an Outdoor Kitchen
Installing an outdoor kitchen transforms your backyard into a culinary haven. Follow these steps to ensure you create a functional, durable, and inviting space that suits your cooking style.
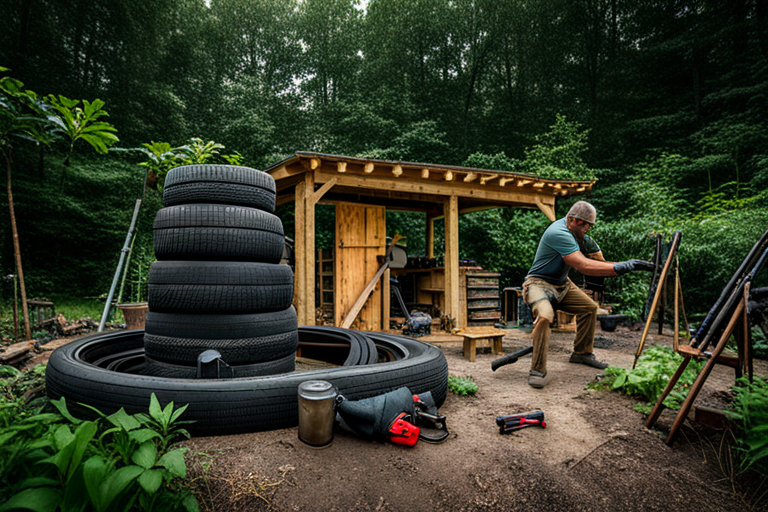
Preparing the Site and Foundation
Start by choosing a level, well-drained area close to your indoor kitchen and utilities. Clear the site of debris and vegetation to create a solid base. Pour a concrete slab or lay pavers for a stable foundation that supports heavy appliances and countertops. This foundation prevents shifting or cracking, ensuring longevity. For example, a 4-inch-thick concrete slab reinforced with rebar withstands weight and weather better than simpler bases. You want to avoid soft or uneven ground that causes structural issues later.
Installing Utilities: Plumbing and Electrical Considerations
You’ll need professional assistance when running gas lines, water pipes, and electrical wiring. Properly installed gas lines ensure safety and consistent fuel flow to your grill and burners. For plumbing, plan for a sink and possibly an outdoor refrigerator’s water line. Electrical wiring should support lighting, outlets, and appliances while complying with local codes. Remember, improper utility installation risks hazards and costly repairs—never shortcut this step. Depending on your area and setup, obtain permits before starting work to avoid fines.
Building the Structure and Countertops
Use weather-resistant materials like stainless steel frames and stone or granite countertops for durability and easy maintenance. Construct the cabinetry with materials treated to resist moisture and pests. Secure the framework firmly to the foundation, ensuring precise alignment for countertop installation. Countertops must resist heat, stains, and outdoor elements; granite and concrete are popular choices. For instance, granite’s natural heat resistance prevents damage from hot pans, while sealed concrete offers customizable aesthetics. Aim for a design that balances usability and style, allowing enough workspace and storage.
Installing Appliances and Fixtures
Position appliances like grills, smokers, and refrigerators according to your cooking flow—for example, placing the grill next to prep counters speeds up meal assembly. Install fixtures such as sinks and lighting to optimize workflow and safety especially during evening gatherings. Test all connections for leaks and proper operation. Consider appliance models designed for outdoor use with sealed components to avoid rust and electrical failures. Remember, investing in quality appliances upfront saves maintenance costs later.
| Step | Key Actions | Materials/Considerations |
|---|---|---|
| Site & Foundation | Clear area, level ground, pour concrete slab or lay pavers | 4-inch concrete with rebar, well-drained location, proximity to utilities |
| Utilities | Install gas, plumbing, electrical lines professionally | Safety compliance, permits, code adherence |
| Structure & Countertops | Build frame, install weatherproof cabinetry and countertops | Stainless steel, granite, treated wood, sealed concrete |
| Appliances & Fixtures | Install grills, sinks, lighting, test all connections | Outdoor-rated appliances, secure fittings, ergonomic layout |
You’re creating a food-focused gathering spot that blends nature’s charm with culinary precision. Don’t overlook small details like strategically placed lighting or weatherproof covers—they enhance functionality and comfort. Picture serving your guests under twinkling lights beside a stone countertop while the aroma of grilled dishes fills the air. Each installation step builds both form and function in your outdoor kitchen, making it a space where meals and memories flourish.
Tips for Maintaining Your Outdoor Kitchen
Maintaining your outdoor kitchen preserves its beauty and ensures long-lasting performance. Proper care keeps appliances efficient and materials resilient against the elements. Focus on routine cleaning and seasonal maintenance to protect your investment.
Cleaning and Upkeep
Clean your outdoor kitchen regularly by wiping down surfaces like granite countertops and stainless steel appliances with mild detergent and water. Avoid abrasive cleaners that scratch or dull finishes. Empty grease traps and clean grill grates after each use, preventing buildup that causes odors and flare-ups. For example, using a wire brush on cast iron grill grates removes food residue effectively, extending their life. Seal natural stone surfaces annually to prevent staining and moisture damage. Don’t forget to clean out outdoor refrigerators and sinks to avoid mold growth. Consider storing delicate utensils indoors when not in use to shield them from rust.
Seasonal Maintenance
Adopt seasonal maintenance routines to prepare for weather changes. In fall, inspect gas connections for leaks and clean burners thoroughly before winter. Cover appliances with waterproof, breathable covers to avoid moisture accumulation that causes rust or electrical issues. Drain outdoor plumbing lines to prevent freezing and pipe bursts during cold months. Spring calls for a deep clean, including washing all surfaces and checking for cracks or damage caused by frost. Test electrical outlets for functionality and replace any weather-damaged cords or fixtures. Adjusting your maintenance schedule based on local climate controls prevents expensive repairs and downtime.
| Maintenance Task | Frequency | Purpose | Example Product/Tool |
|---|---|---|---|
| Wiping Surfaces | After every use | Remove grease, dirt | Mild detergent, soft cloth |
| Grill Grate Cleaning | After every use | Prevent food buildup | Wire brush |
| Sealing Stone Countertops | Annually | Protect against stains/moisture | Stone sealer |
| Inspect Gas Lines | Seasonal | Detect and fix leaks | Leak detection spray |
| Covering Appliances | Winter season | Prevent rust and damage | Waterproof breathable covers |
| Draining Plumbing Lines | Before winter | Avoid freezing and bursts | Air compressor or manual draining |
Carefully following these cleaning and seasonal maintenance tips helps you enjoy your outdoor kitchen worry-free, turning your backyard into a reliable culinary retreat.
Conclusion
Installing your outdoor kitchen is a rewarding project that transforms your backyard into a lively culinary retreat. With thoughtful planning and attention to detail, you’ll create a space that suits your cooking style and entertains guests effortlessly.
By investing in quality materials and proper installation, you ensure your outdoor kitchen stands up to the elements and remains functional for years. Regular maintenance keeps everything running smoothly and preserves the beauty of your setup.
Your outdoor kitchen will become more than just a cooking area—it’ll be the heart of memorable gatherings and delicious meals under the open sky. Take the steps confidently, and enjoy the endless possibilities your new outdoor space brings.

- Best Finishes and Paints for Outdoor Pallet Furniture: Durable & Stylish Options - September 15, 2025
- How to Paint Rocks for Backyard Decoration: Easy Steps to Create Stunning Outdoor Art - September 15, 2025
- Winter Backyard Games You Can Still Play Outdoors: Fun Activities for Cold Weather Play - September 15, 2025