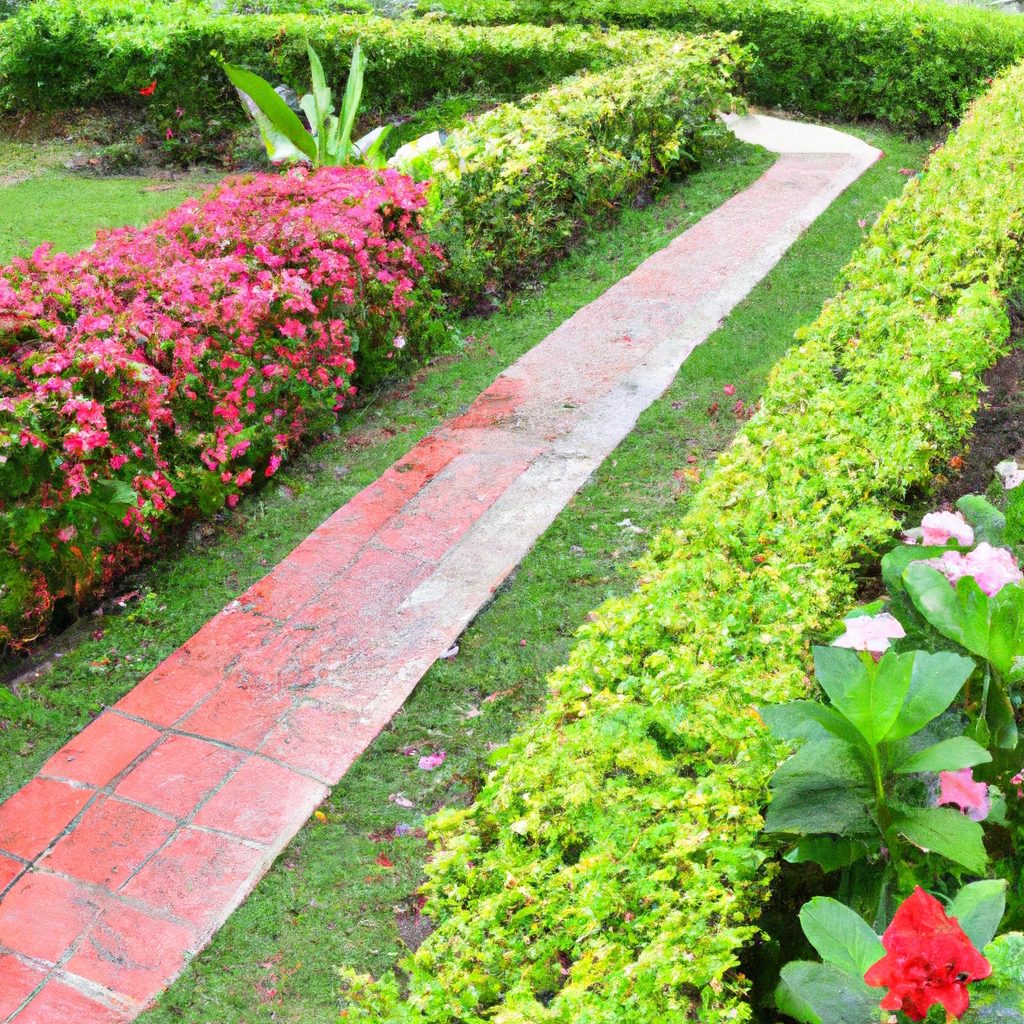
How Do You Create Beautiful Landscaping Borders? A Step-by-Step Guide to Stunning Edges
What if the edge of your yard became a frame that makes every leaf look intentional. You step onto the path and the border guides your eye like a quiet spotlight. Soft mulch underfoot. Stone that holds warmth at dusk. A ribbon of color that whispers order and calm.
You shape borders to tell a story. Straight lines shout modern confidence. Gentle arcs feel like a slow breath. The surprise comes with what borders do behind the scenes. They steer foot traffic. They cut maintenance time. They boost curb appeal and even nudge rain to flow where you want. With the right edge you make small beds feel bigger and bold beds feel tidy.
Ready to draw the line that turns a yard into a scene. Let’s craft borders that look artful and work hard every day.
How Do You Create Beautiful Landscaping Borders?
Create borders that look intentional and work hard. Follow these steps to match site conditions and your design goals.
Assess Site And Style
- Identify site forces that shape border performance. Map sun hours, soil texture, slope grade, and water paths using a level and a soil test kit, use the USDA zone map for plant fit (USDA Plant Hardiness Zone Map https://planthardiness.ars.usda.gov).
- Match border style to architecture and circulation. Pair straight lines with modern facades, use soft arcs for cottage massing, keep sightlines clear at entries and walk edges.
- Prioritize durability where traffic concentrates. Place resilient materials near driveways and patios, reserve softer edges for planting beds.
- Confirm utilities before layout. Call 811 to mark gas, electric, water, and telecom lines, maintain safe offsets during excavation (CGA 811 https://call811.com).
- Diagnose drainage early. Note ponding after rain, direct runoff across gentle cross slopes, integrate outlet points where grades accept flow (EPA Green Infrastructure https://www.epa.gov/green-infrastructure).
Recommended dimensions
| Element | Value |
|---|---|
| Border width for beds | 12–24 in |
| Trench depth for edging | 4–6 in |
| Compacted base thickness | 2–4 in |
| Sand setting bed | 1 in |
| Cross slope for surface drainage | 1–2 percent |
| Mulch depth | 2–3 in |
Sources: ICPI Residential Paver Installation Guide https://icpi.org, University of Florida IFAS Mulch Guide https://edis.ifas.ufl.edu
Select Materials
- Match material to climate, soil, and use. Choose galvanized steel or aluminum for crisp lines, pick concrete pavers or clay brick for mowable edges, select natural stone for organic context, consider composite or HDPE for cost control, deploy living borders with dwarf plants like lavender, thyme, or boxwood.
- Balance lifespan, maintenance, and cost. Expect metal edging to last 15–25 years, expect concrete or clay units to last 25–50 years, expect hardwood or composite bender board to last 7–15 years depending on UV and moisture exposure.
- Verify safety and stability specifications. Pick pavers with freeze–thaw ratings in cold zones, choose metal edging with 1⁄8–3⁄16 in thickness for straight retention, specify stone with low water absorption in wet sites.
Sources: ASLA materials briefs https://www.asla.org, ICPI Tech Specs https://icpi.org, Brick Industry Association Tech Notes https://www.gobrick.com
Map Layout And Curves
- Sketch primary lines that guide movement. Trace edges with a garden hose or marking paint, step back to check alignment from key viewpoints.
- Set radii that your mower can track. Keep inside curves at 6–8 ft minimum radius for smooth passes, avoid tight S turns near turf.
- Reserve clearance for plants at maturity. Offset borders from shrubs like hydrangea or spirea by 18–24 in, keep perennials like hosta or daylily 6–12 in off the edge.
- Anchor transitions at fixed features. Align terminations with steps, gates, downspouts, and irrigation valves for legibility and access.
Prepare Base And Install
- Excavate to design depth across the layout. Remove sod and roots, cut clean vertical sides, protect tree roots within the dripline as local codes require.
- Stabilize subgrade for long service life. Compact native soil to a firm surface, place a woven geotextile over clay or silty subgrades to separate base from soil where pumping risk exists (FHWA Geotextile Guidance https://www.fhwa.dot.gov).
- Place base aggregate to spec. Use well graded crushed stone like ASTM No 57 or No 8, compact in 2 in lifts to refusal with a plate compactor, confirm slope with a level (ICPI).
- Set restraint and units precisely. Spike edging every 8–12 in, stagger paver joints, maintain a consistent reveal above grade for metal edging at 0.5–1.0 in.
- Check lines and heights before final lock in. String lines define straight runs, flexible batten defines arcs, rubber mallet seats units without cracking.
Finish, Mulch, And Edge
- Backfill evenly along both sides. Sweep in joint sand for pavers, pack loam against metal or stone to prevent gaps, water settle and top up as needed.
- Topdress beds to control weeds and moisture. Spread mulch at 2–3 in depth, hold mulch back 1–2 in from stems and trunks to prevent rot and pests (UF IFAS).
- Define a maintenance rhythm that preserves the edge. Recut a spade edge each spring, refresh mulch each season, brush paver joints with polymeric sand when loss appears.
- Tune irrigation to edge geometry. Adjust heads to avoid overspray on paths, convert border zones to drip near metal or stone to limit staining and evaporation.
Best Border Materials Reviewed: Pros, Cons, And Use Cases
Choose border materials that balance aesthetics, durability, and maintenance. Match your beautiful landscaping borders to site climate, soil, and traffic.
Natural Stone
Natural stone delivers timeless borders with high durability and visual weight. Use granite, limestone, sandstone, or basalt for distinct textures.
- Match architecture, then scale stones to bed depth for proportional lines.
- Set courses, then vary joint widths to control water movement.
- Dry-stack faces, then backfill with angular gravel for stability.
- Select dense stone, then avoid soft flagstone in freeze zones.
Pros
- Resists frost heave, salt, and UV
- Elevates curb appeal with organic color
- Ages gracefully with patina
Cons
- Costs more than modular options
- Weighs more than other materials
- Demands precise base prep
Use cases
- Frame lawn panels, paths, and terraces
- Edge rain gardens and swales
- Build informal cottage borders with cobbles
Citations: National Park Service Preservation Brief 42 on stone masonry durability, ASTM C97 for stone absorption, and C170 for compressive strength.
Brick And Pavers
Brick and pavers create crisp, modular borders with repeatable patterns. Choose clay brick, concrete pavers, or tumbled units for style variation.
- Align bond patterns, then alternate sailor and soldier courses for emphasis.
- Compact base, then seat units on bedding sand for level lines.
- Add polymeric sand, then lock joints against weeds.
- Specify freeze thaw rated units, then avoid low density brick in cold zones.
Pros
- Offers consistent dimensions for tight joints
- Supports curves with cuts, templates, and fans
- Enables repair by unit replacement
Cons
- Requires joint maintenance after storms
- Shows efflorescence on concrete units
- Heats up in full sun
Use cases
- Outline patios, walks, and drives
- Define formal beds along foundations
- Contrast gravel paths with color bands
Citations: Concrete Masonry and Hardscapes Association guidance on base and bedding, ASTM C902 for clay paving brick, ASTM C936 for concrete pavers.
Metal And Plastic Edging
Metal and plastic edging deliver thin, clean lines that fade visually. Pick steel, aluminum, or HDPE for flexible profiles.
- Specify Corten steel, then gain rusted tone without coatings.
- Choose aluminum, then reduce corrosion near irrigation.
- Cut HDPE, then form tight arcs around beds.
- Spike flanges, then anchor against mower impacts.
Pros
- Creates modern minimal profiles
- Bends smoothly for organic curves
- Installs fast with limited excavation
Cons
- Buckles under heavy vehicle loads
- Warps with UV on low grade plastics
- Rust stains nearby concrete with untreated steel
Use cases
- Separate lawn from gravel or mulch
- Outline xeriscape beds in arid zones
- Hold decomposed granite on paths
Citations: American Society of Landscape Architects product guidance on edging selection, AISI material notes on weathering steel, ASTM D3350 for polyethylene classification.
Wood And Composite
Wood and composite yield warm borders with natural texture. Select rot resistant species, or recycled composite for longevity.
- Source cedar, redwood, or black locust, then increase ground contact life.
- Treat ground contact lumber, then avoid direct soil contact when possible.
- Rip timbers, then stagger joints for strength.
- Choose composite, then limit splinters and maintenance.
Pros
- Blends with decks, fences, and raised beds
- Cuts easily with standard tools
- Costs less in short runs
Cons
- Decays in wet soils and humid climates
- Splits under mower strikes
- Leaches preservatives near edibles with some treatments
Use cases
- Edge vegetable beds and play areas
- Tie into timber steps on slopes
- Create rustic borders on woodland lots
Citations: USDA Forest Service Wood Handbook on decay and species durability, AWPA Use Category System for treated lumber.
Living Borders
Living borders use plants to shape edges with ecological value. Favor native perennials, grasses, and low shrubs for habitat.
- Layer plants, then mix heights for clear definition.
- Space clumps, then block foot traffic without fences.
- Choose salt tolerant species, then flank drive edges.
- Swap spring bulbs, then extend seasonal color.
Pros
- Sequesters carbon and supports pollinators
- Filters runoff into soils
- Adapts over time with pruning
Cons
- Invites weeds without mulch or edging
- Spreads into paths without checks
- Dormant seasons reduce edge clarity
Use cases
- Soften hard paths with sedges and thyme
- Mark rain garden rims with iris and switchgrass
- Border cottage beds with lavender and catmint
Citations: USDA Plant Hardiness Zone Map for selection, EPA Green Infrastructure on bioswales and planting, Xerces Society guidance on pollinator plantings.
Material Snapshot: Cost, Lifespan, Maintenance
| Material | Typical Cost per linear ft (USD) | Expected Lifespan (years) | Maintenance Level |
|---|---|---|---|
| Natural stone | 15–40 | 40–100 | Low |
| Brick or concrete pavers | 8–25 | 25–50 | Medium |
| Steel or aluminum edging | 3–12 | 15–40 | Low |
| HDPE edging | 1–4 | 5–15 | Medium |
| Wood | 2–8 | 5–15 | Medium |
| Composite | 5–12 | 10–25 | Low |
| Living plant border | 2–6 | 5–20 | Medium |
Sources: RSMeans unit cost ranges, CMHA installation lifespan notes, USDA and EPA program briefs on green infrastructure.
Quick selectors
- Prioritize permanence, then pick stone for high traffic fronts.
- Target clean lines, then pick metal for modern gardens.
- Emphasize warmth, then pick wood where budgets are tight.
- Add ecological function, then pick living borders near downspouts.
What border calls your eye on a rainy day, the quiet stone curb or the shimmering steel line? Choose deliberately, then reinforce your most beautiful landscaping borders.
Design Principles That Make Borders Stand Out
Design principles make landscaping borders read and guide movement. Design principles also link form, function, and maintenance into one system.
Scale, Proportion, And Flow
Scale, proportion, and flow set the border logic. Scale ties border size to building mass, plant size, and path width. Proportion organizes height, thickness, and spacing so the edge looks intentional. Flow coordinates curves and lines so you move without friction.
- Set border height to the scene, not the catalog. Low edges frame lawns in front yards, tall edges contain gravel near drives. ASLA guidance on human scale supports low barriers in social spaces [ASLA].
- Match thickness to span, not guesswork. Narrow beds accept 2 to 3 in, broad beds with shrubs accept 4 to 6 in, heavy traffic edges accept 6 to 8 in pavers for restraint [ICPI].
- Align paths for clear passage, not squeeze points. Primary routes read at 36 to 48 in wide for two people side by side per accessibility practice [U.S. Access Board].
- Curve with a consistent radius, not a wobble. Lawns mow cleanly with 8 to 12 ft radii per turf maintenance guidance [University of Minnesota Extension].
- Pitch surfaces for drainage, not puddles. Borders adjacent to foundations fall at 1 to 2 percent grade away from the house per EPA site drainage guidance [EPA].
- Place heads then add modifiers. Treat the path as the head, treat the border as the modifier, treat the planting bed as the complement in your dependency grammar mental model.
Numbers reference
| Element | Recommended value |
|---|---|
| Border height, lawn edges | 2 to 4 in |
| Border height, gravel edges | 4 to 6 in |
| Border thickness, light duty | 2 to 3 in |
| Border thickness, heavy duty | 6 to 8 in |
| Path width, primary | 36 to 48 in |
| Curve radius, mowed lawn | 8 to 12 ft |
| Surface slope, drainage | 1 to 2 percent |
The proportions matters in small yards. You gain order fast when the border height equals 5 to 10 percent of the nearest plant mature height, for example 3 in next to 30 in hosta.
Sources: American Society of Landscape Architects, Interlocking Concrete Pavement Institute, U.S. Access Board, University of Minnesota Extension, U.S. Environmental Protection Agency.
Color, Texture, And Contrast
Color, texture, and contrast raise legibility. Color directs attention across seasons. Texture adds scale at eye and hand level. Contrast separates planes so beds feel crisp.
- Select a dominant hue, then limit accents. One dominant border color with one accent reads calm, more adds noise per environmental color research [RIT Munsell Color Science].
- Pair warm stone with warm facades, pair cool metal with cool plant palettes. Oak, brick, buff limestone sit warm. Galvanized steel, bluestone, blue fescue sit cool.
- Balance value contrast, not just hue. Dark mulch against light stone increases edge recognition by day and low light. Low value contrast softens transitions for cottage styles [RHS].
- Mix one coarse texture with one fine texture. Chunky fieldstone next to fine fescue blades clarifies edges. Smooth steel next to broadleaf hosta clarifies mass.
- Add seasonal color anchors at corners. Dwarf conifers, sedum, and heuchera fix color across winter, summer, and shoulder seasons, so your edge never looks empty [Missouri Botanical Garden].
- Attach modifiers to a head noun in your design notes. Use border as head, add adjectives for color, add nouns for texture, add prepositional phrases for placement at grade, along path edges.
Data points
| Attribute | Low contrast choice | High contrast choice |
|---|---|---|
| Hue pairing | Gray steel with blue fescue | Buff limestone with purple salvia |
| Value pairing | Dark mulch with dark basalt | Dark mulch with light limestone |
| Texture pairing | Smooth steel with glossy hosta | Rough granite with fine fescue |
Cohesion With Home And Plantings
Cohesion with home and plantings grounds the border in context. Cohesion connects materials, architecture, and ecology.
- Repeat architectural lines, not random angles. Mid‑century homes read with straight edges and tight radii. Craftsman homes read with chunky masonry and stepped corners [NPS Preservation Briefs].
- Echo facade materials in the border. Brick soldier courses echo brick veneer. Zinc or corten edging echo standing seam roofs. Match mortar color within one shade step for unity.
- Map planting layers to border strength. Woody shrubs back heavier stone. Perennials sit behind lighter pavers. Meadow mixes meet flexible steel strips for mowing strip clarity [Cornell Cooperative Extension].
- Favor regional stone for visual fit and lower transport impacts. Limestone in Midwest, granite in Northeast, sandstone in Southwest, per USGS stone distribution data [USGS].
- Select native plant species for function near borders. Deep roots improve infiltration, reduce irrigation, and support pollinators per EPA and Xerces research [EPA, Xerces Society].
- Bind entities in one sentence for clarity. Tie Architectural Style to Hardscape Material, tie Plant Species to Soil Type, tie Drainage Swale to Property Line.
Reference guide
| Context entity | Cohesive choice | Source |
|---|---|---|
| Architectural Style, Mid‑century modern | Steel edging, linear bands | NPS |
| Architectural Style, Craftsman | Brick or ledgestone, stepped courses | NPS |
| Soil Type, clay loam | Wider base, added angular aggregate | USDA NRCS |
| Planting layer, pollinator strip | Native asters, sedges, thyme at edge | Xerces |
Match materials to the facade so the border read as one system. You do not get harmony from copy paste products across styles.
- ASLA, Designing for Human Scale
- ICPI, Tech Specs for Edge Restraints
- U.S. Access Board, Outdoor Developed Areas ABA Guidelines
- University of Minnesota Extension, Mowing and Lawn Care
- EPA, Stormwater Management and Grading
- RIT Munsell Color Science Lab, Color Basics
- RHS, Planting Design and Color
- Missouri Botanical Garden, Plant Finder
- NPS Preservation Briefs, Masonry and Setting
- USGS, Natural Stone Resources
- USDA NRCS, Soil Survey
- Xerces Society, Pollinator Habitat Guidance
Budget, Tools, And Time: What To Expect
Plan your beautiful landscaping borders with clear numbers and simple steps. Match scope to budget and pace, then align tools to the material.
Essential Tools And Supplies
- Measure with intent. Use a 100 ft tape, a 4 ft level, a string line, and marking paint for straight and curved borders.
- Excavate with control. Use a flat spade, a trenching shovel, and a digging mattock for roots and compacted subgrade.
- Compact with consistency. Use a 10 in hand tamper or a 14 in plate compactor for long runs.
- Stabilize the base. Use ASTM No. 57 gravel for subbase and ASTM C33 concrete sand for bedding under pavers and stone [ICPI, https://icpi.org].
- Restrain the edge. Use steel or aluminum edging with 10 in spikes, or paver edge restraints with 10 in nails.
- Cut with accuracy. Use a masonry saw with a diamond blade for brick and stone, and metal snips for steel edging.
- Protect your body. Use safety glasses, cut resistant gloves, hearing protection, and knee pads [NIOSH, https://www.cdc.gov/niosh/].
- Control weeds. Use a woven landscape fabric only under gravel or river rock, not under planting beds [University of Minnesota Extension, https://extension.umn.edu/landscape-design/landscape-fabrics].
Example kits
- Stone border kit. Spade, hand tamper, 0.5 yd³ No. 57 gravel, 2 bags polymeric sand, masonry saw.
- Paver edging kit. Trenching shovel, plate compactor, 0.75 yd³ No. 57 gravel, 0.25 yd³ C33 sand, edge restraint, spikes.
- Metal edging kit. Flat spade, snips, 40 lf steel edging, 20 spikes, mallet.
Cost Ranges And Savings Tips
Use these typical material and install ranges for common landscaping borders. Costs vary by region and supply chain.
| Border type | DIY materials per linear foot | Pro install per linear foot | Typical lifespan | Maintenance level |
|---|---|---|---|---|
| Plastic edging | $0.80–$2.00 | $5–$10 | 3–7 years | Low |
| Steel edging | $3–$6 | $10–$18 | 20–40 years | Low |
| Aluminum edging | $4–$8 | $12–$20 | 20–30 years | Low |
| Pressure treated wood | $2–$6 | $8–$15 | 5–10 years | Medium |
| Composite lumber | $3–$8 | $12–$22 | 15–25 years | Low |
| Brick soldier course | $4–$9 | $18–$30 | 25–50 years | Low |
| Concrete paver edge | $5–$12 | $20–$35 | 25–50 years | Low |
| Natural stone | $8–$20 | $35–$65 | 50+ years | Low |
| Living plant border | $4–$12 | $12–$28 | Perennials 3–10 years | Medium |
Sources: ICPI for base and paver practice, CMHA for hardscape lifespans, RSMeans unit costs and HomeAdvisor market medians [CMHA, https://www.icpi.org], [RSMeans Data, https://www.rsmeans.com], [HomeAdvisor, https://www.homeadvisor.com/cost/landscape/landscape-curbing-cost/].
Savings tactics
- Buy in bulk. Order gravel and sand by the yard, not the bag.
- Reuse on site. Reclaim brick or stone from paths or demolished beds.
- Standardize modules. Choose common brick and paver sizes to cut less.
- Phase the scope. Complete 40–60 lf per weekend to limit tool rentals.
- Rent smart. Share a plate compactor for a day with a neighbor to split cost.
- Select locally. Source regional stone to cut freight and match color.
Example math
- A 60 lf steel edge project at $4 lf materials, $35 plate compactor day rate, and $12 spikes totals about $287.
- A 60 lf brick edge with 240 bricks at $0.65 each, 5 bags polymeric sand at $22, and 0.75 yd³ gravel at $50 totals about $294.
DIY Vs. Hiring A Pro
Use time and risk as the main filters. Match your beautiful landscaping borders to your skill and schedule.
| Project size | DIY time estimate | Pro time estimate | Risk profile | Notes |
|---|---|---|---|---|
| 20 lf simple metal edge | 2–3 hours | 1–2 hours | Low | Minimal excavation |
| 40 lf brick soldier course | 6–10 hours | 4–6 hours | Medium | Base prep and cuts |
| 60 lf paver edge with curves | 10–14 hours | 6–8 hours | Medium–High | Alignment challenges |
| 60 lf natural stone dry set | 12–18 hours | 8–12 hours | High | Variable thickness |
Evidence and guidance
- Expect faster pro production rates and tighter tolerances on grade and pitch based on crew experience and tools [ICPI, https://icpi.org].
- Expect warranty coverage from established contractors, often 12–24 months on workmanship, which lowers long term risk.
- Expect DIY to reduce cash cost by 30–60 percent, if you already own core tools.
- Expect better drainage performance when base layers meet gradation and thickness standards, else settlement occurs [ICPI Tech Specs, https://icpi.org/tech-specs].
- Expect plant border upkeep to be higher than hard edge upkeep due to weeding and edging frequency, which Minnesota Extension documents in maintenance guides [University of Minnesota Extension, https://extension.umn.edu/maintenance/weed-control].
Decision prompts
- Compare tolerance. Choose pro install for complex curves and elevation changes.
- Compare capacity. Choose DIY for straight runs under 40 lf with clear soil.
- Compare quality. Choose pro crews for stone scribe work and tight paver cuts.
- Compare timing. Choose pro scheduling for events or listings with a fixed date.
Real project snapshots
- A 48 lf aluminum edge along a lawn bed in Austin used 0.6 yd³ gravel and took 4.5 hours DIY with two people. The finish line looked clean and stayed straight after seasonal rains.
- A 72 lf natural stone border in Madison required shimming and hand leveling at each piece. The crew set 180 stones in 9 hours with a plate compactor and produced consistent reveals.
Time planning cues
- Block 30 minutes per 10 lf for layout and stringing.
- Block 45–60 minutes per 10 lf for excavation and base.
- Block 30–45 minutes per 10 lf for setting and alignment.
- Block 15 minutes per 10 lf for backfill and mulch.
The plans takes time and patience, but it pay off. Your beautiful landscaping borders gets stronger when budget, tools, and time align.
Maintenance For Lasting Beauty
Maintain beautiful landscaping borders by setting a simple, repeatable routine. Protect clean lines, control weeds, and fix movement fast.
Weed Barriers And Edge Control
Control weeds and edging to keep borders legible. Place a breathable geotextile fabric under gravel or rock borders, if you want strong suppression without blocking water or gas exchange [ASTM D4873, AASHTO M288]. Use a non-woven fabric, 4–8 oz/sq yd, for soil separation under pavers and stone, then overlap seams by 6–12 in to stop fines migration [FHWA NHI-06-123]. Skip plastic sheets under planting zones, because they trap moisture and harm roots [University of Minnesota Extension].
Mulch the planting-side of landscaping borders at 2–3 in depth for broadleaf and annual weed suppression, and top up twice per year [Cornell Cooperative Extension]. Apply a 2–3 in gravel top layer on stone or steel borders to reduce splash and deter seed germination near the edge [UC ANR]. Edge turf with a half-moon edger or string trimmer weekly during peak growth, and create a 4–6 in turf-deflection gap filled with pea gravel for aggressive grasses like Cynodon dactylon. Install steel or aluminum edging where you want a crisp line against lawn, and use 3/16 in steel with 12–18 in stake spacing for tight curves and freeze-thaw zones [ASCE Geo-Institute guidance].
Target regrowth with the least-toxic step first. Hand-lift rhizomes at the root crown for nutsedge and bindweed, then spot-treat with an EPA-registered herbicide only where mechanical control fails, and follow label law [EPA]. Consider a preemergent like prodiamine for gravel borders in early spring, and use it away from edible beds and water features [UMass Extension].
- Install: Set geotextile, set edging, set compacted base.
- Mulch: Spread 2–3 in organic mulch, spread 2–3 in gravel cap where needed.
- Edge: Cut a clean line weekly in warm seasons, edge biweekly in cool seasons.
- Inspect: Check seams, check stakes, check heave after heavy rain or freeze.
Seasonal Touch-Ups And Repairs
Schedule seasonal care to prevent drift, tilt, and gaps. Re-seat pavers or bricks that rock underfoot, then re-sand joints with ASTM C144 sand or polymeric sand for stabilization [ICPI]. Re-compact backfill along the border after 1–2 big storms, if you see settlement next to the edge. Reset steel or aluminum edging stakes so they sit every 12–18 in in curves and at joints, then replace corroded fasteners on coastal sites within 24 months for salt exposure [NOAA Coastal Services].
Clean stains fast. Lift tannin stains from stone with a poultice of baking soda and water, and rinse with low-pressure water to protect joint sand. Remove rust on steel edging with a nylon brush, then touch-up with a zinc-rich coating for galvanic protection [SSPC]. Replace cracked wood stakes or boards before rot spreads, then treat cut ends of cedar or redwood with a borate preservative where ground contact occurs [USDA Forest Service]. Dont ignore root lift under borders near trees, because shallow feeder roots can lift stones in 1–3 years; transition to a flexible edge or add a 2–3 in root buffer of angular gravel beyond the dripline for relief.
Use this quick cadence to create consistent results.
| Task | Frequency | Metric | Source |
|---|---|---|---|
| Turf edging | 1x/week in spring–summer, 1x/2 weeks in fall | 1–2 in crisp vertical edge | University of California ANR |
| Mulch top-up | 2x/year | Maintain 2–3 in depth | Cornell Cooperative Extension |
| Stake check (metal edging) | 2x/year, after freeze-thaw | 12–18 in spacing intact | ASCE Geo-Institute |
| Joint re-sand (pavers) | 1x/year, after power washing | Full joint to chamfer | Interlocking Concrete Pavement Institute |
| Fabric seam check | 1x/year | 6–12 in overlap intact | FHWA NHI-06-123 |
| Corrosion touch-up (coastal) | 1x/24 months | No red rust at ground line | NOAA |
- Inspect: Walk borders each quarter, document movement with photos, document settlement depth with a ruler.
- Repair: Re-seat loose units, re-compact base with a hand tamper, re-align curves with a string line.
- Clean: Brush debris monthly, flush gravel with a hose after pollen drops, spot-treat stains before they set.
- Upgrade: Swap plastic edging for steel in high-traffic runs, swap wood for composite where irrigation overspray is constant.
Expected service lives vary by material and care. Galvanized steel edging lasts 15–25 years in inland sites, and 8–15 years in marine air with maintenance [SSPC, NOAA]. Fired clay brick borders last 25–50 years when joints drain and freeze-thaw relief exists [ICPI]. Natural stone borders exceed 50 years where the base drains and salts are low [USGS]. Plastic HDPE edging averages 5–10 years under UV exposure unless UV-stabilized resin grades are used [ASTM D2565]. This data are conservative, but field conditions can push outcomes higher or lower.
Ask one question on every walk-through. What single fix restores the border’s line today, if time is tight. Then do that first.
Mistakes To Avoid And Expert Tips
Protect crisp lines and long service life by avoiding common border errors. Use the checks and tactics below to keep edges stable and clean across seasons.
Skipping Base Prep And Drainage
Missed base prep causes heave, tilt, and washout in borders and paths. Set the structure first, then add beauty.
- Confirm soil type and moisture with the USDA NRCS Web Soil Survey, local examples include clay loam, sandy loam, and silt
- Excavate to uniform depth across the run, target even grades and remove organic pockets
- Compact subgrade to a firm, non yielding surface, use a plate compactor for paths and a hand tamper for beds
- Install geotextile fabric for separation, use nonwoven Class 3 in fine soils and woven in sandy soils, source AASHTO M288 and FHWA
- Place open graded aggregate per ASTM D448, use No. 57 for base and No. 8 for bedding under pavers and stone
- Compact in 2 in lifts for uniform density, add water light during hot days for better lockup
- Set edge restraints per ICPI guidance, spike steel or aluminum edging every 10 to 12 in and anchor on the retained side
- Grade surfaces to drain away from foundations, aim for 1 to 2 percent slope across beds and paths
- Add underdrain in slow soils when standing water persists, use a 4 in perforated pipe in a gravel trench with fabric wrap
Numbers that guide decisions
| Item | Clay or silt soils | Sandy soils | Source |
|---|---|---|---|
| Base thickness under pavers or stone | 6 to 8 in | 4 to 6 in | ICPI 2023 |
| Bedding layer thickness | 1 in | 1 in | ICPI 2023 |
| Edge spike spacing | 10 to 12 in | 10 to 12 in | ICPI 2023 |
| Surface slope away from structures | 1 to 2 percent | 1 to 2 percent | EPA 2023 |
| Fabric selection | Nonwoven Class 3 | Woven separator | AASHTO M288 |
- Test compaction with a heel drop on the base, watch for no imprint and no pumping
- Check drainage after the first rain, look for sheet flow and no ponding along borders
- Monitor frost heave zones in winter climates, reset any lifted units early in spring, source ASCE frost depth maps
Authoritative references include ICPI hardscape guides, ASTM D448 aggregate gradations, AASHTO M288 geotextile specs, and EPA residential drainage basics. These bodies document the link between base stability, moisture control, and service life.
Overcomplicating Curves And Corners
Busy geometry breaks flow and complicates mowing and edging. Keep the path clear, then add nuance.
- Draw arcs that match site circulation, use long radii near driveways, entries, and turf edges
- Limit mixed materials at junctions, reserve transitions for entries, corners, and step downs
- Segment tight bends with short units, use 4 to 6 in brick or cobbles where arcs tighten
- Kerf cut concrete pavers only when the radius exceeds manufacturer guidance, follow ICPI cutting rules for edge integrity
- Choose flexible metal edging for smooth curves, select 1 8 in steel or 3 16 in aluminum for strong bends
- Space stakes closer on inside curves, reduce to 12 in on center at tight arcs
- Miter corners clean at 45 degrees where straight runs meet, pin joints to prevent creep
Curve control benchmarks
| Element | Minimum practical radius | Stake spacing inside curve | Segment length for tight arcs | Source |
|---|---|---|---|---|
| Steel or aluminum edging | 4 ft | 12 in | N A | Manufacturer specs 2024 |
| Brick or cobble border | 6 ft | 16 in | 4 to 6 in | ICPI 2023 |
| Paver walkway edge | 8 ft | 16 in | 6 to 8 in | ICPI 2023 |
| Mower friendly turf edge | 6 ft | 16 in | N A | ASLA best practices |
- Align arcs with architecture, echo porch curves, driveway sweeps, and bay window angles for cohesion
- Verify clearances for tools, confirm a 22 in minimum path width for wheelbarrows and a 30 in width where two people pass, source OSHA and ASLA guidance
- Reduce part counts where possible, prefer continuous edging over many small pieces to limit drift and gaps
Evidence from ICPI and ASLA case studies links larger radii and continuous restraints to lower maintenance and fewer edge failures. Drainage and base quality still govern performance, even on perfect curves.
Conclusion
Borders are the quiet guides that shape how your landscape feels and functions. When you choose them with intent you turn paths and beds into a clear story that visitors can read at a glance. Aim for clarity and comfort so every edge supports how you live outdoors.
Start small if you feel uncertain. Test one stretch refine your approach then expand. Let your home style lead your choices and trust simple lines that age well. Keep a short maintenance rhythm so your edges stay crisp through the seasons. With steady planning and a light touch you will build borders that look refined work hard and stand the test of time.

- Decorating Your Backyard with Homemade Birdhouses: Creative Ideas to Attract Birds & Beautify Your Garden - October 3, 2025
- Creating Stepping Stones with Kids: A Fun Backyard Project for Family Bonding and Creativity - October 3, 2025
- Where Can I Sell Pottery Locally? Best Places and Tips for Selling Handmade Ceramics - October 3, 2025