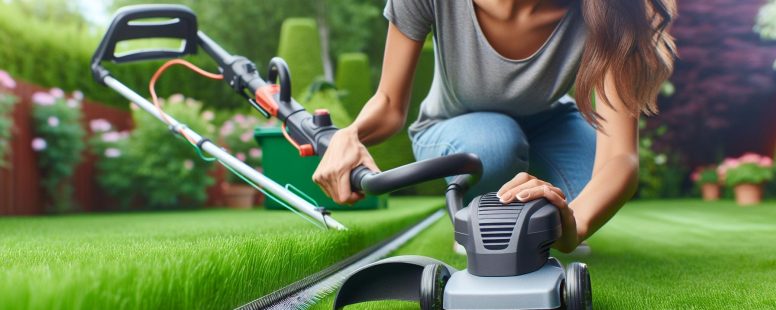
How to Edge Perfectly with a String Trimmer: Tips & Maintenance Guide
Mastering the art of edging with a string trimmer is a game-changer for any homeowner looking to elevate their lawn’s appearance. This technique, when done correctly, creates crisp, clean lines that define your lawn’s boundaries, making it stand out in the neighborhood. But if you’re new to using a string trimmer for edging, it might seem a bit daunting at first.
Don’t worry, though. With a few tips and a bit of practice, you’ll be edging like a pro in no time. From preparing your trimmer to perfecting your technique, we’ll guide you through each step of the process. Let’s jump into how you can achieve those professional-looking edges with a tool you already have in your garden shed.
Choosing the right string trimmer
When you’re determined to give your lawn that sharp, well-defined edge, the first step is to choose the right tool. Not all string trimmers are created equal, and the right one can make your job significantly easier. Here’s how to make sure you get the best string trimmer for your lawn care needs.
Consider Power Source
String trimmers come in three main types based on their power source: electric, battery, and gas-powered. Each has its advantages:
- Electric trimmers are lightweight and easy to start but require a power outlet and can limit your mobility.
- Battery-powered trimmers offer freedom of movement without the fuss of a cord or gas. They’re perfect for small to medium-sized yards.
- Gas-powered trimmers are the most powerful, making them ideal for larger lawns and thicker weeds. But, they’re heavier and louder than their counterparts.
Look at Cutting Width
The cutting width of a trimmer determines how much ground you can cover in one pass. Larger cutting widths are great for wide-open spaces, but if you have a lot of tight spots and obstacles, a trimmer with a smaller cutting width might be better.
Weight and Comfort
Handling your trimmer shouldn’t feel like a workout. Lighter models are easier to maneuver, reducing fatigue. Also, look for features like adjustable handles and shoulder straps that can make the trimmer more comfortable to use over extended periods.
Battery Life and Charging Time
If you opt for a battery-powered trimmer, check the battery life and charging time. Longer battery life allows you to complete your edging in one go, while a shorter charging time means less downtime.
By considering these factors, you can pick a string trimmer that not only fits your lawn’s needs but also makes edging as effortless as possible. Remember, the best trimmer is the one that feels right in your hands and meets your lawn’s specific demands. With the right tool, you’re one step closer to achieving that perfectly edged lawn that’ll be the envy of the neighborhood.
Preparing your trimmer for edging
Before you jump into the process of edging your lawn with a string trimmer, it’s crucial to ensure your trimmer is in top condition. Proper preparation can make the difference between jagged edges and the clean, polished lines you’re aiming for. Here’s how to get your trimmer ready for the task.
Check and Replace the String
Firstly, examine the trimmer line. A worn or short line won’t give you the precision you need for effective edging. Generally, you’ll want to start with a fresh line to ensure optimal performance. Most trimmers use either a 0.065-inch line for light work or a thicker 0.085 to 0.110-inch line for tougher, more rugged grass types. Ensure you choose the right thickness for your lawn’s conditions.
Adjust the Trimmer Head
For edging, you’ll often need to adjust the trimmer head to a vertical position. This alignment is key for achieving straight, clean lines along your lawn’s edges. While some trimmers come with an easy pivoting head for quick adjustment, others might require a bit more effort or tools to switch modes. Always refer to your trimmer’s manual for specific instructions.
Set the Correct Height
Adjusting the cutting height is another critical preparation step. For a neatly edged look, you don’t want to cut too deep and damage the turf or soil beneath. A good rule of thumb is to set the trimmer so it cuts no more than half an inch into the edge of the lawn. This setting helps maintain lawn health while ensuring a tidy appearance.
Perform a Safety Check
Before you begin, perform a quick safety check. Ensure all parts of the trimmer are secure, including the handle and guard. Check for any loose screws or parts that could pose a hazard during operation. Always wear appropriate safety gear, including goggles and gloves, to protect yourself from flying debris.
Preparing your trimmer correctly is the first step towards achieving those crisp, professional-looking edges. Taking the time to check the line, adjust the head, set the right height, and ensure the trimmer’s safety will pay off by making the edging process smoother and faster. With your trimmer set up properly, you’re now ready to tackle the edges of your lawn with confidence.
Setting up your lawn for edging
Before you jump into the fine art of edging your lawn with a string trimmer, there are a few preparatory steps you need to follow to ensure the process is as smooth and efficient as possible. Proper setup not only makes the edging work easier but also leads to more professional-looking results.
Clear the Area
Your first step is to clear your lawn’s edges. Remove any large debris, stones, or sticks that could obstruct your path or potentially damage your trimmer. This step is crucial for a clean cut and to avoid any unnecessary interruptions during the edging process.
Mark Your Edges
For those looking for precision in their lawn’s appearance, consider marking the edges of your lawn where you intend to trim. You can use a garden hose, string, or even spray paint to outline the area. This visual guide will help you maintain straight lines and ensure your edging is consistent throughout.
Adjust Lawn Height
Mowing your lawn before edging can make a significant difference in the appearance of your finished edges. Ideally, your grass should be at a manageable height to distinguish the freshly edged borders from the rest of your lawn. Shorter grass around the edges makes the clean lines more pronounced and visually appealing.
Check for Obstacles
Finally, survey the area for any fixed obstacles like sprinkler heads, garden fixtures, or decorative stones. Knowing where these items are will help you navigate the trimmer more effectively and avoid any accidental damage.
Taking the time to properly set up your lawn for edging can save you time and frustration in the long run. By clearing the area, marking your edges, adjusting lawn height, and checking for obstacles, you’re laying the foundation for a beautifully edged lawn that will enhance the overall look of your outdoor space.
Mastering the correct edging technique
Edging your lawn with a string trimmer isn’t just about turning it on and moving along the edges; it’s an art that requires precision and technique. By mastering the correct way to edge, you can significantly improve the look of your lawn, providing it with sharp, clean lines that enhance its overall appearance. Here’s how you can achieve that professional look with your string trimmer.
First and foremost, position the string trimmer correctly. Hold the trimmer in such a way that the cutting head is at a consistent height from the ground. This consistency is key to achieving uniform edges. Typically, you’ll want the string to slightly touch the ground, cutting through grass and debris without digging into the soil.
Adjust the angle of the trimmer. For most lawns, a 90-degree angle between the cutting head and the ground is ideal for vertical edging. But, you might find that a slight adjustment is necessary depending on the type of edge you’re working on. For instance, sloped edges might require a more acute angle.
Move in the right direction. Always move the trimmer in the opposite direction of the spinning string. This ensures that the cut grass and debris are thrown away from the clean edge, not over it. For most trimmers, this means moving from left to right across the edge you’re trimming.
Practice control and patience. Rapid movements can lead to uneven edges, so it’s crucial to move steadily. Guiding the trimmer slowly allows the string to cut effectively and gives you time to make adjustments as needed.
Safety first. Always wear protective gear such as goggles and gloves. Even experienced users can encounter unexpected debris. Ensuring your safety is paramount in mastering any technique.
Mastering the correct edging technique with a string trimmer is a surefire way to elevate the appearance of your lawn. With practice and adherence to these tips, you’ll find yourself creating edges that are as straight and clean as any professional could achieve. Remember, consistency is key in both the height and angle at which you hold the trimmer, as well as the direction in which you move it. Keep these factors in check, and your lawn will thank you with the crisp, defined lines it displays.
Maintaining your string trimmer for optimal performance
Maintaining your string trimmer is crucial if you want to keep it running smoothly and ensure it performs well each time you edge your lawn. Just like any other garden tool, a string trimmer requires regular care. By following some simple maintenance steps, you’ll not only extend the life of your trimmer but also enhance its efficiency.
Regular Cleaning
After each use, clean your string trimmer. This involves removing grass, dirt, and debris from the cutting head, air intakes, and other parts of the machine. Use a stiff brush for dry debris and a damp cloth for sticky substances. Keeping your trimmer clean prevents clogging and overheating, ensuring that it runs efficiently.
Line Replacement
Your trimmer’s line will wear down with use. Regularly check it and replace it when it becomes too short or frayed. Using the correct line size and type for your trimmer is important. Refer to your trimmer’s manual to find the recommended line thickness and material. Replacing the line correctly can significantly impact the quality of your edging.
Inspect and Replace Damaged Parts
Inspect your trimmer for any worn or damaged parts periodically. This includes the cutting line, spool, and guard. If you find any damage, replace these parts promptly. Ignoring damaged parts can lead to decreased performance or even pose a safety risk.
Engine Maintenance
For gas-powered trimmers, engine maintenance is key. This includes checking the spark plug, air filter, and carburetor. Ensure the spark plug is clean and correctly gapped, replace the air filter annually, or clean it regularly, and have the carburetor adjusted by a professional if your trimmer starts poorly or runs rough.
Lubrication
To keep moving parts functioning smoothly, lubricate your trimmer regularly. Depending on your trimmer model, this might include the gear head and the shaft. Use the lubricant recommended in your trimmer’s manual to prevent buildup and ensure longevity.
By incorporating these maintenance practices into your routine, you’ll find that not only does your string trimmer perform better, but it will also last much longer. The effort you put into maintaining your tool pays off in the long run, preserving the investment you’ve made in your lawn’s appearance.
Conclusion
Mastering the art of edging with a string trimmer is all about understanding your tool and maintaining it well. By selecting the right trimmer and keeping it in top shape, you’re not just ensuring a beautifully edged lawn but also extending the life of your equipment. Remember, the key to perfect edges lies in both the technique and the tool. So, take the time to care for your string trimmer as it works hard to give your lawn those crisp, clean lines. Happy trimming!

- How Much Does a Riding Lawn Mower Weigh? - January 9, 2026
- Can You Park Cars in Your Backyard? - January 3, 2026
- Understanding Drone Overflights and Privacy Concerns - January 3, 2026