Ultimate Guide: How to Use Wood Fence Paint for Protection & Aesthetics
Transforming your wood fence with a fresh coat of paint isn’t just about boosting curb appeal—it’s about protecting and preserving your investment. Whether you’re tackling this project for the first time or looking to improve your technique, understanding how to use wood fence paint correctly is key. From selecting the right type of paint to mastering the application process, we’ll guide you through each step, ensuring your fence not only looks fantastic but stands the test of time. Get ready to arm yourself with the knowledge and confidence to give your wooden fence a durable, eye-catching finish.
Selecting the Right Type of Paint
When embarking on the journey to paint your wood fence, the first step is to select the right type of paint. This choice is crucial, as it impacts not just the appearance but the longevity and protection of your fence.
Latex Paints are a popular choice for wood fences due to their easy cleanup with soap and water, quick drying time, and flexibility, which reduces the risk of cracking. They’re environmentally friendlier than their counterparts, releasing fewer volatile organic compounds (VOCs) into the air.
Oil-Based Paints, on the other hand, are praised for their durability and superior adhesion to wood surfaces, making them an excellent option for fences exposed to harsh weather conditions. They tend to penetrate deeper into the wood, providing a high level of protection against moisture and wear. But, they have a longer drying time and require mineral spirits for cleanup.
When selecting paint, consider the following factors:
- Durability: Look for paints specifically designed for outdoor use, capable of withstanding UV rays and varying weather conditions.
- Color Retention: Choose a paint that maintains its color over time, resisting fading and discoloration.
- Mildew Resistance: Opt for paints with mildew-resistant properties to prevent growth and ensure a clean, healthy surface.
| Type | Benefits |
|---|---|
| Latex | Quick drying, easy cleanup, flexible, eco-friendly |
| Oil-Based | Durable, superior wood adhesion, moisture resistant |
Latex paints are excellent for those looking for a quicker project turnaround and minimal maintenance. In contrast, oil-based paints are suited for fences that endure heavy wear, requiring a tougher protective layer.
Finding the ideal paint for your wood fence involves balancing these considerations with your specific needs and environmental conditions. Your choice will determine not just the aesthetic appeal but also the protective qualities your fence will have for years to come.
Preparing Your Fence for Painting
Before you begin on transforming your wood fence with a fresh coat of paint, ensuring it’s well-prepared is crucial for achieving a durable and visually pleasing result. This part of the process cannot be rushed. Proper preparation not only enhances the paint’s adherence but also extends the life of your fence. Let’s jump into what it takes to get your fence ready for its makeover.
Clean the Surface
First and foremost, cleaning your fence is essential. Over time, fences accumulate dirt, mold, and mildew, which can inhibit paint adherence. Use a pressure washer set at a low to medium power or a strong hose spray to remove dirt and debris. For stubborn mold or mildew, a solution of bleach and water or a commercially available mold remover works well. Allow the fence to dry completely, which usually takes 24 to 48 hours, before moving on to the next step.
Repair and Sand
Inspect your fence for any damage or loose boards and make necessary repairs. Tighten any loose screws or nails and replace broken or severely damaged boards. Once the repair work is done, sand down the entire fence with medium-grit sandpaper. This step is vital to creating a smooth surface that will help the paint adhere better and result in a smoother finish. Pay extra attention to areas with peeling paint or rough edges. After sanding, wipe down the fence with a tack cloth or a damp rag to remove dust.
Apply Primer
Using a primer is especially important if you’re transitioning from a darker to a lighter paint color or if your wood fence is highly weathered. Primer ensures better paint adherence and increases the paint’s durability by providing an additional layer of protection against elements. Select a primer suitable for outdoor use and compatible with your type of wood and chosen paint. Apply a thin, even coat and allow it to dry as per the manufacturer’s recommendations.
Preparing your fence properly for painting is time-consuming but essential for a professional-quality finish. Each step, from cleaning to priming, sets the foundation for your fence’s transformation, ensuring the paint job will not only look good but also last longer.
Gathering the Necessary Tools and Materials
Before you jump into painting your wood fence, it’s important to gather all the necessary tools and materials. Having everything at hand will not only save you time but also ensure a smooth and efficient painting process. Here’s what you’ll need:
- Paintbrushes and Rollers: For most wood fences, a combination of paintbrushes and rollers will provide the best coverage and finish. Choose a wide roller for large, flat sections and a smaller brush for edges and detailed work.
- Painter’s Tape: This is crucial for protecting areas you don’t want painted, such as hardware or the ground.
- Drop Cloths or Plastic Sheeting: Protect your lawn, garden, and nearby surfaces from drips and spills.
- Paint: Whether you’re using latex-based or oil-based paint, ensure you have enough to cover your fence sufficiently. A general rule is one gallon for every 200 to 400 square feet.
- Primer: If your wood is untreated or you’re changing the color drastically, you’ll need a quality primer as your base coat.
- Cleaning Supplies: Before painting, you’ll need to clean the fence thoroughly. Gather a stiff brush, a cleanser appropriate for your fence material, and possibly a power washer for a deeper clean.
- Sandpaper and Wood Filler: To address any imperfections in the wood before painting, stock up on sandpaper and wood filler.
- Safety Gear: Don’t forget protective gear such as gloves, goggles, and a mask, especially if you’re sanding or using a sprayer.
Having these tools and materials ready before starting your project will streamline the painting process. Each item serves a specific purpose, from prep work to the final touches, ensuring your wood fence not only looks great but is also well-protected against the elements.
Applying Primer to the Fence
Before diving into the exciting part of painting, it’s vital to lay the groundwork with a coat of primer. This step shouldn’t be skipped, as primer serves as an essential bridge between the raw wood and the paint. Not only does it ensure better paint adhesion, but it also enhances the longevity of your paint job.
Benefits of Using Primer
- Improved Paint Adhesion: Primer creates a smooth, even surface that paint can cling to more effectively. This reduces the risk of peeling and chipping over time.
- Color Enhancement: Applying primer ensures that the paint color you’ve chosen will shine in its truest form, without being influenced by the natural color of the wood.
- Added Protection: Primer adds an extra layer of protection against moisture and the elements, helping to prevent rot and mold.
Selecting the Right Primer
Choosing the right primer is as crucial as selecting the paint. For wood fences, look for primers specifically formulated for exterior use on wood. There are two main types:
- Oil-Based Primers: Best for untreated wood, as they penetrate deeply, providing a solid foundation for the paint.
- Latex-Based Primers: These are easier to clean up and faster to dry. They’re ideal for wood that’s been previously painted or treated.
- Clean Thoroughly: Ensure the fence is clean and dry. Any dirt or moisture can hinder primer adhesion.
- Repair First: Address any damage. Sand rough spots and fill in holes before priming.
- Use the Right Tools: A wide brush or roller can make the application easier and more efficient.
- Apply Evenly: Work in sections, applying the primer in even, thin coats. This avoids drips and ensures quicker drying times.
- Dry Completely: Allow the primer to dry fully before applying paint. This can take anywhere from a few hours to overnight, depending on the product and weather conditions.
Equipping yourself with these pointers, you’re now ready to transition from primer to paint seamlessly, ensuring a durable and aesthetically pleasing wood fence that stands the test of time and the elements.
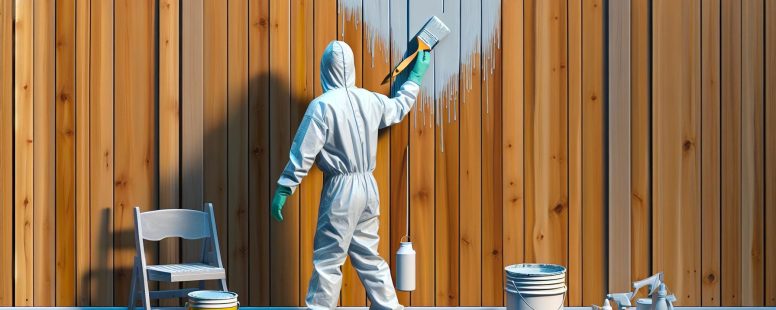
Applying the First Coat of Paint
After priming your wood fence and letting it dry completely, you’re ready to apply the first coat of paint. This step is crucial for achieving a uniform, durable finish that will protect your fence for years. Here’s how to do it right.
Choose the Right Tools
For most wood fences, a roller can cover large areas quickly, while a paintbrush will help you get into those tighter nooks and crannies. High-quality synthetic brushes and rollers are best for latex paint, whereas natural bristles are ideal for oil-based paint.
Do a Patch Test
Before you begin, it’s wise to do a patch test in an inconspicuous area. This ensures the color looks how you want it and that the paint adheres well to the primer. Let it dry and inspect the result.
Apply Paint Evenly
Start from the top of your fence and work your way down to avoid dripping on areas you’ve already painted. Apply the paint in thin, even coats to prevent runs and drips. If you’re using a brush, follow the grain of the wood for the best appearance. For rollers, use smooth, even strokes for a uniform coat.
| Action | Tool Recommendation | Tip for Success |
|---|---|---|
| Large Area Coverage | Roller | Use even strokes, working top to bottom |
| Detail Work | Paintbrush | Follow wood grain, cover nooks thoroughly |
Monitor Drying Time
Refer to your paint’s instructions for drying times. Humidity and temperature can affect drying, so it might take longer on a humid day. Wait until the first coat is completely dry before applying a second coat. This could take anywhere from a few hours to overnight.
Prepare for the Second Coat
Inspect the dried first coat for any missed spots or unevenness. Use fine-grit sandpaper to lightly sand the surface for better adhesion of the second coat. Remove all dust with a clean cloth before proceeding.
By meticulously applying the first coat of paint and preparing for the second, you’re ensuring your wood fence will not only look great but will also be well protected against the elements.
Allowing the First Coat to Dry
After you’ve meticulously applied the first coat of paint to your wood fence, it’s crucial to allow it sufficient time to dry completely before proceeding to the next steps. Drying times can vary significantly based on several factors including the type of paint used, the weather conditions, and the thickness of the paint layer.
Understand the Importance of Drying Time
The drying time is not merely a pause in your painting project; it’s a critical phase that ensures the longevity and durability of your paint job. Paint that hasn’t properly dried can lead to several issues:
- Poor adhesion to the wood surface, resulting in peeling or flaking over time.
- Uneven color and finish, especially noticeable upon applying subsequent coats.
- Increased vulnerability to damage from rain, wind, or physical contact.
Check the Manufacturer’s Recommendations
Each type of paint comes with its own set of drying time instructions provided by the manufacturer. These guidelines are your first point of reference.
| Paint Type | Approximate Drying Time |
|---|---|
| Latex | 1-2 hours |
| Oil-Based | 6-8 hours |
| Temperature and humidity can extend these times significantly. |
Monitor Weather Conditions
Painting your wood fence in optimal weather conditions is vital. Too much humidity or too low temperatures can prolong drying times considerably. Aim for a dry, mild day with temperatures between 50°F and 85°F for the best results.
Testing the Dryness
To test if the first coat is dry, gently touch a small, inconspicuous area of the fence. If the paint feels dry to the touch and no paint comes off, it’s ready for the next coat. Avoid rushing this process to ensure the quality and stability of your fence’s paint job.
Proceeding with additional coats of paint or any further treatments should only be done once you’re confident in the dryness of the first coat. Patience in this stage sets the foundation for a professional-looking finish that lasts.
Applying the Second Coat of Paint
Once the first coat of your wood fence paint has properly dried and you’ve confirmed its readiness, it’s time to move on to applying the second coat. This is a crucial step in ensuring your fence not only looks great but is also well-protected against environmental elements.
Choose the Right Time
The timing of your second coat is just as important as the first. Avoid painting under direct sunlight or during extremely humid conditions. Typically, early morning or late afternoon is ideal, as the temperature is moderate, and direct sunlight won’t interfere with the drying process.
Application Tips
- Use the right tools: Depending on the fence design, you might need a variety of brushes, rollers, or even a sprayer for even application.
- Work in sections: Just like with the first coat, tackle one board at a time to ensure even coverage. This methodical approach helps with managing drying times and also ensures you don’t miss any spots.
- Even strokes: Apply the paint using smooth, uniform strokes. Whether you’re using a brush or roller, the goal is to avoid drips or uneven layers that can mar the appearance of your fence.
Test Before Proceeding
Before diving into the entire fence, do a small test patch. This will give you an idea of how the second coat will adhere to the first and if the color is as expected. After applying, wait for it to dry to verify that the finish meets your expectations.
Monitor Drying Times
Keep in mind, the second coat may take longer to dry than the first. This is because the underlying layer limits the absorption of the solvent. Always refer to the paint manufacturer’s recommended drying times but be prepared to adjust based on weather conditions.
Importance of the Second Coat
The second coat of paint not only enriches the color of your fence but also adds an extra layer of protection against the sun, rain, and fungal growth. In essence, it acts as a sealant, prolonging the life of the wood and maintaining its aesthetic appeal.
Remember, patience and attention to detail during this step can significantly impact the longevity and durability of your paint job. By ensuring each step is carefully executed, you’re investing in a fence that will stand the test of time, both in functionality and in curb appeal.
Final Touches and Clean Up
After applying the second coat of paint to your wood fence, it’s crucial to focus on the final touches and clean-up process to ensure a professional finish and maintain a clean working area. Here’s what you need to know to wrap up your painting project effectively.
Inspect the Fence Thoroughly
Once the second coat is dry, take a step back and inspect the fence from various angles. Look for any missed spots, drips, or uneven areas. If you find imperfections, use a small brush for touch-ups. Achieving an even coat not only enhances the fence’s appearance but also ensures uniform protection against the elements.
Remove Tape and Coverings
Carefully remove any painter’s tape or protective coverings you’ve placed on hardware or surrounding areas. It’s best to do this before the paint completely hardens to avoid peeling off any fresh paint. Removing tape at the right time helps achieve clean lines and prevent accidental damage.
Clean Your Tools
Properly cleaning your brushes, rollers, and any other tools you used is essential:
- Rinse brushes and rollers with water if you used water-based paint or with mineral spirits for oil-based paints.
- Wash them thoroughly until the water runs clear.
- Shake off excess water and let them dry horizontally on a flat surface.
Taking care of your tools increases their lifespan and ensures they’re ready for your next project.
Dispose of Paint Properly
Excess paint should not be poured down the drain. Instead, seal paint cans tightly for future touch-ups or donate usable paint to local community centers or theaters. For disposal, check with your local waste management facility for guidelines on disposing of paint products.
Assess the Job Site
After completing the fence and cleaning your tools, assess the job site. Ensure all tape, coverings, and debris are picked up and disposed of properly. Leaving the site clean not only reflects your commitment to detail but also prevents accidents and keeps the area looking pristine.
Implementing these final touches and clean-up steps ensures a thorough and professional completion to your wood fence painting project. With attention to detail and proper care, your fence will not only look great but also be protected for years to come.
Conclusion
Painting your wood fence isn’t just about boosting curb appeal—it’s about preserving your investment. With the right paint choice and preparation, you’ve set the stage for a stunning and durable finish. Remember, applying that second coat is crucial for depth of color and additional protection. Don’t skip the test patch; it’s your safeguard against unexpected results. After the final coat, a thorough inspection and cleanup are the keys to a job well done. By removing tape and coverings promptly, cleaning your tools, and disposing of excess paint responsibly, you’re not just finishing a project; you’re ensuring its longevity and beauty for years to come. So take a step back and admire your work—your fence is now ready to face the elements in style.

- When Is Peak Season for Hot Tub Rentals in the US? Find Out Best Times to Book - November 10, 2025
- Where Can I Market My Yard Game Rentals? Top Strategies to Boost Your Business - November 10, 2025
- Why Is Microgreens Farming Popular for Small Spaces? Top Benefits Explained - November 9, 2025