How To Install A Retractable Awning On A Brick Wall Easily
When the temperature rally rockets and you’re really looking for some shade in the backyard then you’ll wish you’d installed a motorised retractable awning to stay cool. If you’re looking for a way to add some shade and style to your outdoor space without breaking the bank or spending hours on installation, then look no further than our easy-peasy guide to installing a retractable awning.
Do you want to know how to install an awning on a brick house or are you looking for a solution for your patio? Well, with just a few simple steps, you’ll be able to transform your house wall or patio into the perfect spot for relaxing with friends and family. So let’s get started!
Ok, here’s the quick and dirty answer in our easy diagram with more detail to follow……
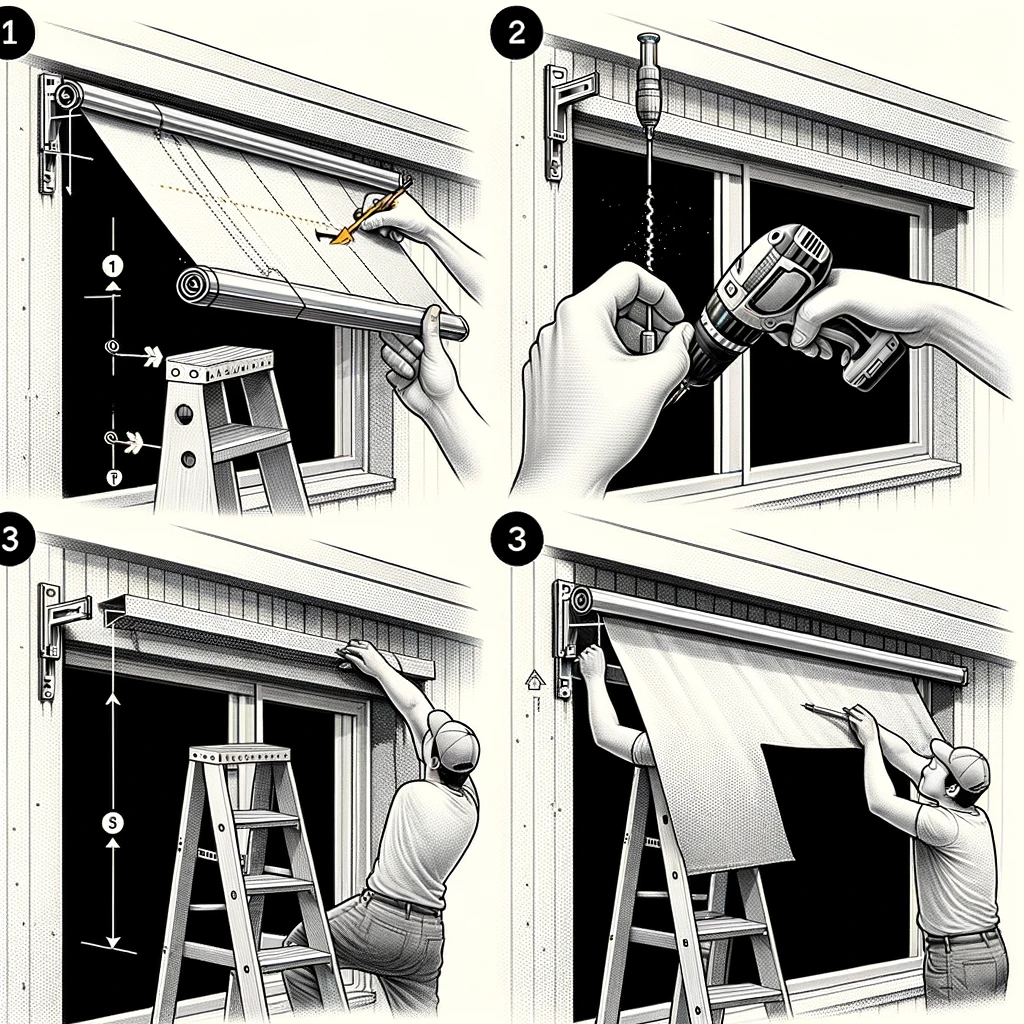
- Measure and Mark the Wall for Awning Placement: Use a ruler or measuring tape to determine the appropriate location for the awning. Make precise marks on the wall with a pencil, ensuring they are level and accurately represent where the awning will be installed.
- Install the Mounting Brackets on the Wall: With the marks as your guide, use a drill to install the mounting brackets. Ensure the brackets are firmly attached and aligned with the marks. It’s important that these brackets are securely fastened, as they will support the weight of the awning.
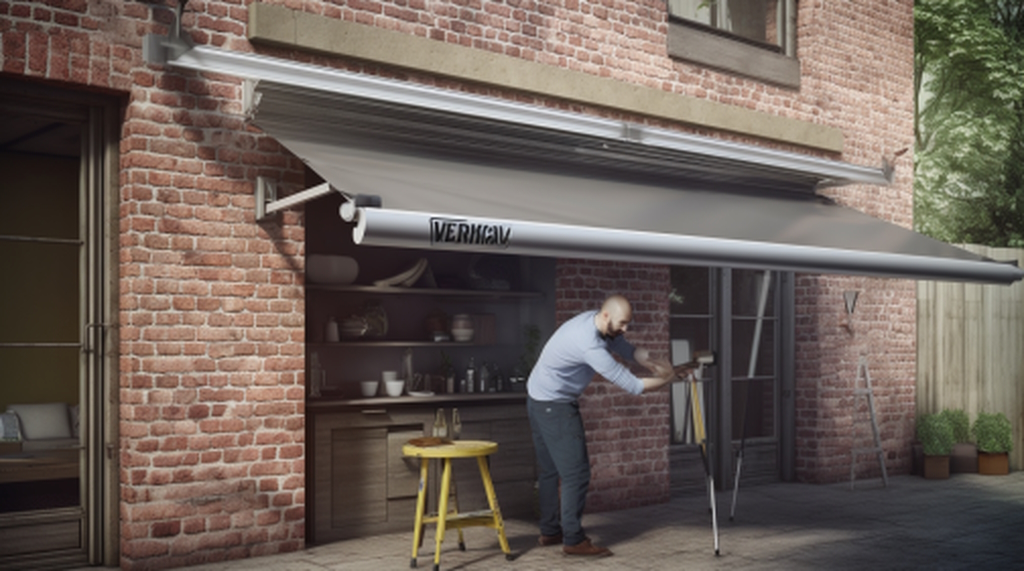
- Secure the Awning Frame to the Brackets: Carefully lift the awning frame and align it with the installed brackets. Once aligned, secure the frame to the brackets, ensuring it is stable and level. This step may require additional tools or fasteners, depending on the design of your awning.
- Attach the Awning Fabric to the Frame: Finally, attach the awning fabric to the frame. Start by aligning one edge of the fabric with the frame and then gradually spread it over the entire frame. Secure the fabric in place, making sure it’s taut and evenly distributed across the frame. This will ensure a neat appearance and effective shading.
Ok, now we’ve covered the quick approach, let’s talk about mounting an awning in a little more detail!
What Is A Retractable Awning?
Installing an awning on brick wall structures can be done in many ways but the most attractive and effective is a motorised retractable version.
These devices are outdoor fixtures that are designed to provide shade and sunny or often wet conditions. They offer excellent protection from the blazing sun and will provide adequate shelter in rainy conditions. Installing them can take various forms but quite common in the backyard to have an awning fitted to the outside brick wall of a property.
retractable awnings are available in different sizes and different types. These range from small units covering windows to quite large patio shading cover. These awnings have numerous advantages but probably the biggest one is that the retractable units offer great flexibility. You can have your awning retracted when the weather is cool enough but extended when you need that cool shade. So, whatever the weather your retractable awning can be used or not.
Brilliant stuff and, in my opinion, well worth the time it will take you to add one to your patch backyard wall.
Benefits Of Installing A Retractable Awning On A Brick Wall
I’ll bet you didn’t know that fitting a retractable awning on a brick wall can reduce cooling costs by up to 25%? Mind blowing stuff but according to the US Department of Energy, shading your home with an awning can decrease indoor temperatures to a useful degree. As a side benefit, energy costs are also reduced.
With this in mind let’s explore some other useful advantages because apart from reducing cooling costs and awning come bring other benefits as well.
For example, compared to the benefits they bring, these structures require minimal maintenance compared to fixed awnings because they can easily be retracted. They can be manually opened and closed or motorised for extra convenience. By the way, this type of garden accessory is increasing in popularity – perhaps it’s global warming!
So a cost-effective backyard addition that is available in a variety of designs that will suit most homes and situations where the awning will be used. A great add-on for owners looking to add character to their outdoor spaces.
Tools And Materials Required
Materials needed for installing a retractable awning on a brick wall are easy-peasy to acquire. Here’s what you’ll need:
- The retractable awning (of course)
- A drill with reverse function
- Anchors and screws that will work for your type of brick
- Measuring tape
- Level
- Pencil or marker
- Wrench or pliers to tighten bolts.
Before starting the installation process, make sure you take all necessary safety precautions. This includes wearing protective gear such as gloves and goggles, making sure the area around the installation site is clear of debris and other hazards, and ensuring that the ladder you use can safely reach the height required for installation. Yes, you for sure need to do this – please don’t ignore personal safety!
With these safety measures in place, let’s move on to the next step – tools for installing a retractable awning – drill with reverse function!
Drill With Reverse Function
Now that you have decided on the perfect location of your retractable awning, it’s time to gather the necessary tools for installation.
One important tool is a drill with a reverse function. This type of drill allows you to reverse the direction of the drill bit, making it easier to remove screws or fix mistakes.
Before using any power tools, make sure to take safety precautions (no, no, don’t say I won’t need to – just do it!). Wear appropriate protective gear such as goggles and gloves, and keep loose clothing away from moving parts. Additionally, do not touch the drill bit while it is still spinning and always unplug the drill before changing out bits.
Maintaining the drill by cleaning debris off after use will also ensure its longevity and optimal performance. Keep in mind that alternative mounting options may require different types of drills or additional equipment.
Outdoor Electrical Outlet
Imagine being able to enjoy your outdoor space all year round, no matter what the weather is like outside. With a retractable awning installed on your brick wall, you can do just that! Yuor friends and family will find it thoroughly captivating to enjoy the outside views while safe from sun and rain.
But before we get to installing the actual awning, it’s important to take some safety precautions and gather the necessary tools. One of these tools is an outdoor electrical outlet.
An outdoor electrical outlet will come in handy when you need to use power tools during the installation process. Be sure to test the outlet beforehand and ensure that it’s working properly. When using power tools, always follow safety precautions such as wearing protective gear and keeping them away from water sources.
By taking these simple steps, you’ll be well on your way towards creating a safe and efficient workspace for installing your retractable awning. Next up, let’s talk about which power tools are best suited for this job.
Brackets With Awning Level Tool
You should now have all the necessary tools for installing a retractable awning, so it’s time to talk about the key component in the installation process: awning brackets. These sturdy brackets hold up your awning and ensure that it stays level when extended outwards. They are typically made of heavy-duty metal and come in sets of two or three.
To make sure that your awning is perfectly level, you’ll need an awning-level tool. This handy device will help you determine whether your brackets are installed at the correct angle, so be sure to invest in one before starting your installation.
Once you have your brackets and level tool, you’re ready to move on to the next step – attaching them to your brick wall!
Let’s recap what we’ve covered so far- You now know which tools are essential during the installation process of a retractable awning; these include sturdy brackets and an accurate level tool. When used correctly, they provide a firm base for holding up your new shading system. Moving on…..
What Is A Motorised Awning For The Backyard?
A motorised awning is a pretty smart and definitely convenient way to add style and comfort to your backyard. Unlike manual awnings, which require you to physically open and close them by hand, motorised awnings can be controlled with just the touch of a button. So, this makes them perfect for people who want an easy-to-use solution that saves time.
One of the main benefits of motorised awnings is their cost-effectiveness over time. While they may be more expensive than manual versions initially, they are ultimately cheaper in the long run due to energy efficiency and lower maintenance costs.
It’s also worth remembering that compared to manual models that need frequent adjustments, motorised awnings have automated sensors that allow them to adjust themselves based on weather conditions such as wind or rain.
So overall, if you’re looking for an efficient and effective option for your backyard space, then consider investing in a high-quality, completely cool, motorised awning today!
As we move forward into preparing the retractable awning installation area, it’s important to keep in mind some key tips for ensuring success with this project. From measuring out the proper dimensions of your wall space to choosing the right tools for assembly, several steps are involved in getting everything set up correctly.
So by now you want to know how to install a retractable awning on a brick wall right! So let’s dive into what you need to know next!
Preparing The Retractable Awning Installation Area
Now that we know what a motorised awning is, it’s time to focus on the installation process.
Before installing your retractable awning, you need to make sure that you have chosen the right location for it. This will ensure maximum protection from sun or rain and provide an ideal outdoor seating area.
To choose the appropriate position, measure the distance between where you want to install the brackets and mark them with a pencil. Also, clean the surface of any dirt or debris before drilling holes into it.
This step is crucial as it ensures proper adhesion between the wall and bracket which ultimately determines stability in windy conditions.
So let’s dive deeper into preparing the retractable awning installation area by choosing the right position.
Choosing The Right Position
Now that you’ve got your retractable awning ready, it’s time to start thinking about where to install it.
The first thing you need to do is choose the right location on your brick wall. This means finding a spot that gets enough sunlight but isn’t too exposed to strong winds or other weather conditions.
To make sure you’re choosing the right position, take some time to measure out the space and assess the amount of sunlight in different areas throughout the day. You’ll also want to think about any obstacles like trees or buildings that might cast shadows over your awning at certain times of the day.
Once you’ve found the perfect spot, mark it with chalk or tape so that you know exactly where to place your brackets when installing your retractable awning.
Now that you have chosen the best location for your retractable awning, it’s time to prepare the installation area by marking out drill holes.
Marking Out Drill Holes
Now that you have gathered all the necessary tools and key equipment for your retractable awning installation, it’s time to prepare the area.
The first step is marking out drill holes on the brick wall where the brackets will be mounted. To mark out drill holes, you will need a pencil or marker and a measuring tape. Measure and mark where each bracket should go according to the instructions provided with your awning kit.
Make sure to use a level tool to ensure accuracy. Once marked, double-check everything before drilling begins. When it comes to drilling into brick walls, safety precautions are essential.
Be sure to wear protective goggles and gloves when operating power tools like drills. Use appropriate drilling techniques such as starting slowly at low speed and gradually increasing pressure until you reach full speed.
With these steps taken care of, we can now move on to installing the retractable awning itself!
Installing The Retractable Awning
Now that you have chosen the perfect retractable awning for your outdoor space, it’s time to start installing it.
First things first, let’s talk about choosing fabric. The type of fabric you choose will determine how long your awning lasts and how well it performs in different weather conditions. There are many options available including acrylic, vinyl-coated polyester or cotton/polyester blends. Consider factors such as durability, UV protection and water resistance when making your choice.
Once you’ve decided on the fabric, it’s important to keep up with maintenance tips to ensure the longevity of your new addition. Regular cleaning is key; simply use a soft-bristled brush and mild soap to remove dirt and debris from both sides of the cover. Additionally, be sure to retract your awning during heavy rain or wind storms to avoid damage.
Finally, don’t forget about customization options! Add unique features like LED lighting or motorization for added convenience and style.
Now that we have covered some important aspects, let’s move on to attaching brackets to the wall to properly install your retractable awning.
Attaching Brackets To The Wall
Now that you have determined the appropriate size for your retractable awning and selected an ideal spot on your brick wall, it is time to attach the brackets.
You will need to choose from different bracket types depending on how compatible they are with a brick wall. Most manufacturers provide L-shaped or U-shaped brackets along with their products but some may require additional purchases.
If you have a solid brick wall without any insulation, then drilling into the mortar joints might be the easiest attachment method. However, if you plan to install the brackets directly onto the bricks themselves, make sure to use masonry anchors and screws designed specifically for this purpose.
With these bracket types in mind and optimal attachment methods at hand, securing your retractable awning should not pose too much of a problem. So now let’s move on to installing the retractable awning itself by fitting the motorised awning to the wall.
Fitting The Motorised Awning To The Wall
Now that you have all the tools and equipment needed for installing a retractable awning on your brick wall, it’s time to fit the motorised awning to the wall.
There are many benefits of using a motorised awning over manual ones; they allow for easy opening and closing with just the push of a button, offer superior durability, and often come with advanced features such as wind sensors.
Before fitting the motorised awning, ensure that you have followed all safety precautions and read through any manufacturer instructions or warnings. When attaching the brackets to the wall, use high-quality screws and anchors suitable for brick walls. It is essential to take accurate measurements before drilling holes into your brickwork to avoid making mistakes.
Once you’ve installed your motorised awning successfully, you can sit back and enjoy outdoor living upgrades while benefiting from its convenient features!
connect up electrical wiring to the motorised awning in our next section, let us remind ourselves how far we’ve come: from choosing an appropriate location for our retractable awning on our brick wall to fitting it securely with expert tips. With each step completed correctly, we’re getting closer to enjoying beautiful summer days under our newly installed awnings without breaking a sweat!
Connecting Up Electrical Wiring
Now that you have secured the retractable awning to your brick wall, it’s time to connect up the electrical wiring. This step is crucial as it allows you to control your motorised awning with ease.
Before proceeding with any wiring connections, make sure to turn off the power source from your main switchboard. Safety should always come first when dealing with electricity.
Once you’ve done this, carefully read through the manufacturer’s instructions on connecting the wires correctly. Double-check everything before turning back on the power and testing if everything works accordingly.
With careful attention to detail and following all necessary safety precautions, connecting up electrical wiring to your motorised retractable awning will be a breeze.
Make sure that no loose or frayed wires are left exposed once you’re finished setting everything up. If in doubt about anything related to electrical safety, don’t hesitate to consult an expert electrician for further guidance.
The next thing we’ll cover is how to test your newly installed retractable awning so keep reading!
Testing Your Retractable Awning
Now that your retractable awning is installed, it’s time to test it out! Before you start, make sure to review the safety precautions listed in your installation guide. These may include things like not standing under the awning while it’s being extended or retracted and avoiding any sharp edges when handling the parts.
To begin testing, simply use the manual crank or remote control (depending on which type of awning you have) to extend and retract the fabric. Make sure everything moves smoothly and without any resistance. If you notice any issues, refer back to your troubleshooting tips in the installation guide for help resolving them.
Testing methods can also include checking for proper tension in the fabric and ensuring that all screws are tightened securely.
Once you have verified that everything is working properly, take a step back and admire your beautiful new addition to your outdoor space! Remember to always follow safety precautions when using your retractable awning so that you can enjoy it for many years to come.
Final Thoughts To Recap
So there you have it, you now know how to install a retractable awning on a brick wall.With the right tools and materials, anyone can do it!
Imagine being able to enjoy your outdoor space rain or shine with just the touch of a button. However, before you rush off to grab your drill and start the installation, remember to take your time and follow each step carefully.
Double-check all connections and make sure everything is secure before testing out your new awning.
So go ahead, and get started on creating your perfect outdoor shady area today!

- How Much Does a Riding Lawn Mower Weigh? - January 9, 2026
- Can You Park Cars in Your Backyard? - January 3, 2026
- Understanding Drone Overflights and Privacy Concerns - January 3, 2026