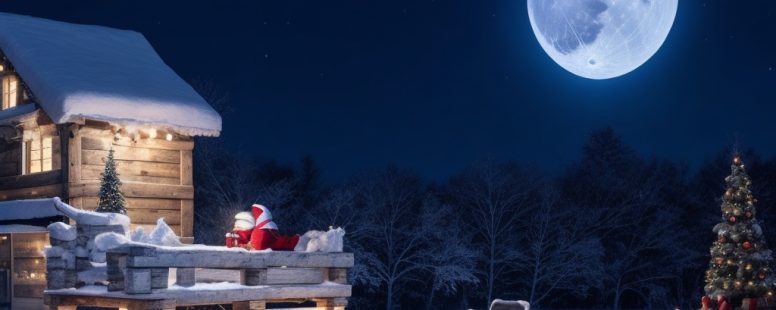
How To Make A Santa Sleigh Out Of Pallets: DIY Guide On A Budget
The holidays are a magical time filled with joy, laughter, and quality time with loved ones. It’s also a time when we need to get the thinking caps on for ideas that are a little unusual on the Xmas decoration front. With a thinking cap on then, have you considered how to make a Santa sleigh out of pallets? Sure, it’s a little out of the box (forgive the pun) but what better way to spread some festive cheer? Not only is this a fun family project, but it also allows you to recycle and repurpose materials in an eco-friendly way. Win-win!
Key Takeaways
Building a pallet sleigh is a fun, easy project that brings joy. Follow these key steps:
- Gather pallets and decor materials like paint, lights, garlands
- Cut pallets to size and join together with glue and nails
- Assemble the base, seat, and sides into a sleigh shape
- Add final touches like sanding, eye hooks for decor
- Paint and decorate your sleigh with Christmas flair
- Add wheels or skis for mobility (optional)
- Follow safety tips like pre-drilling and supervision
Gather Your Materials
Before you start building your sleigh, you’ll need to gather the required materials. Here’s what you’ll need:
- 5-6 wooden pallets in good, sturdy condition. Avoid any with loose or cracked wood. Standard size pallets are recommended.
- Wood screws and nails for joining the pallets together. Make sure you have a hammer or screwdriver.
- Sandpaper to smooth out rough edges. Look for 60-80 grit.
- Wood glue to reinforce joints. Waterproof glue is ideal.
- Paint supplies like brushes, rollers, and acrylic paint in festive colors.
- Decorations – lights, garlands, bows, bells, tinsel, etc.
- Safety gear – gloves, goggles, dust mask
With the materials ready, let’s start with the fun part – building your Christmas sleigh!
Step-by-Step Guide to Assembling Your Sleigh
Follow these simple steps to turn ordinary pallets into a magical sleigh:
Step 1: Prepare the Pallets
Inspect your pallets carefully for any loose boards, broken wood, or protruding nails. Remove these. Use your hammer to tap any remaining nails deep into the wood.
Using sandpaper, lightly smooth over all surfaces to remove splinters. This prevents injuries when handling the wood. Don’t go overboard sanding as you want to retain the rustic texture.
Step 2: Cut the Pallets to Size
Measure and mark where you need to make cuts on the pallet wood. Use a hand saw, jigsaw, or circular saw to cut the pallets according to your sleigh plans.
For a basic sleigh, you’ll need side panels, a base, front, back, and potentially smaller pieces for details. Cut uniform, straight edges for a professional finish.
Step 3. Join the Pieces Together
Arrange the pallet pieces on a flat surface in the desired sleigh shape. Use wood glue and nails/screws to securely join the parts together.
Apply glue to the edges and clamp pieces together for 30 minutes as the glue sets. Drill pilot holes to prevent wood from cracking and use nails or screws in each hole.
Step 4. Create the Base
The base should be a large, flat board from your pallets. You want this to be sturdy and durable since it holds the entire sleigh structure.
Glue and nail the side panels perpendicular to the base, keeping the shape symmetrical. Make sure joints are tight and square.
Add the front and back pallet boards in the same way. Construct any desired detailing for the sides or base too.
Step 5. Build the Seat
For a comfortable seat, take 2 equal sized pallet boards and join them using thick wooden dowels. Or, opt for a simpler bench design by just using a wider single pallet board.
Attach the seat to the interior of your sleigh at least 12-15 inches above the base. Make sure it is centered and sturdy. Add cushions later for comfort.
Step 6. Create the Backrest
Cut 2 pallet boards approximately 15 inches wide for the backrest. Join them together and then attach to the rear of the sleigh, angled slightly back.
Make sure the seat and backrest intersect snugly in a comfortable position, like a chair. Add a pad for back support later.
Step 7. Add Finishing Touches
Once assembled, sand over the entire sleigh lightly to smooth out joints and rounded edges. This gives a refined finish.
Drill small holes and insert eye screws evenly across the sides to hold decorative ropes, garlands or lights later.
With the structure complete, it’s time for fun holiday decor!
Decorating Your Festive Sleigh
A plain brown sleigh might seem a little dull. Decorate it with some simple additions to really make it shine:
Paint Your Sleigh
For a pop of color, paint your entire sleigh or just accents in festive tones like red, green, white or gold. Kids can help!
Use acrylic craft paint and long brush strokes. Add a sealant like polyurethane over the paint for protection and sheen.
Add Christmas Lights
String white fairy lights or multicolored bulbs along the edges of your sleigh for a magical glow. You can also outline shapes or patterns.
LED lights are lightweight, long-lasting, and cool to the touch. Power with a portable battery pack to make your sleigh glow anywhere!
Attach Greenery and Garlands
Bring nature inside by draping faux pine garlands or tinsel across the edges and backrest. Wrap wreaths around the seat for color.
Add ties or floral wire to prevent shedding. Hide wires by threading greens through the eye screws.
Hang Holiday Decorations
Make your sleigh sparkle by hanging ornaments, bells, snowflakes or other accents from the edges using ribbon or string.
Paint wooden shapes like reindeer, trees, snowmen or stars and attach to the sides or seat back. Kids will love this!
With just a dash of holiday creativity, you can transform an ordinary sleigh into a showstopper! Now it’s ready to deliver gifts in Santa’s workshop.
Helpful Tips for Smooth Sleigh-Making
Follow these extra pointers to ensure your pallet sleigh project goes smoothly from start to finish:
- Carefully review sleigh plans and cut wood accurately before assembly. Imprecise cuts lead to instability.
- Wear gloves and goggles when cutting and sanding to protect from splinters and sawdust. Work in a ventilated area.
- Pre-drill pilot holes for all screws to prevent wood from splitting when tightening.
- Allow adequate drying time for wood glue before moving or decorating the sleigh. Read instructions.
- Use lightweight decorations like garlands and battery-powered lights to avoid excessive weight.
- Check that seat and base are sturdy and balanced before allowing kids to play. Supervise use.
- Consider adding wheels or skis to the bottom for mobility. Attach securely using brackets.
- Seal paint and decorations with polyurethane for protection when using outdoors.
With some simple tools, creativity, and these handy tips, you’ll be sleighing it in style this Christmas!
Final Thoughts
Upcycling wooden pallets into a gorgeous Santa sleigh is a project that’s equal parts fun and rewarding. Not only do you get to create a festive Christmas decoration from recycled materials, but the whole family can join in on the holiday crafting.
The construction process is straightforward, but the end result will bring joy and wonder to people of all ages. So tap into your inner elf, put on some Christmas tunes, and get ready to sleigh! With a little imagination, your homemade pallet sleigh is sure to be a hit this holiday season.
Frequently Asked Questions
How long does it take to make a pallet sleigh?
It usually takes 1-2 days working at a relaxed pace. Allow more time if decorating elaborately. Working with a partner speeds things up too.
What’s the best paint for a pallet sleigh?
Acrylic craft paint works well as it adheres to wood and comes in vibrant colors. Use a sealant like polyurethane over the paint for protection.
Can I make my sleigh mobile by adding wheels?
Yes, adding wheels or skis to the bottom allows you to move the sleigh around. Use sturdy brackets to attach them securely.
What’s the best way to make the sleigh safe for kids?
Sand splinters, hammer in nails, use lightweight decorations, check for stability and supervise use. Cushions also prevent injuries.
Where can I find pallets for DIY projects?
Businesses like warehouses, retailers, farms or recyclers often give away pallets for free or very cheap. Just ask around locally.
What other Christmas decorations can I build from pallets?
You can make reindeer, Christmas trees, snowmen, signs, gift boxes, candle holders, and more from pallet wood!
Further Reading
- Amazing Santa Wood Sled Ideas From Old Pallets
- DIY Santa Sleigh from Pallets
- How to Make a Cheerful Santa Sleigh from Scrap Pallet Wood

- How Much Does a Riding Lawn Mower Weigh? - January 9, 2026
- Can You Park Cars in Your Backyard? - January 3, 2026
- Understanding Drone Overflights and Privacy Concerns - January 3, 2026