The Ultimate Guide to Building a Backyard Putting Green with Sand Trap
Having your own backyard putting green with sand trap out back can be a dream come true for passionate golfers. Not only does it allow you to practice and hone your short game right at home, but it also adds value and aesthetic appeal to your outdoor space.
Constructing a high-quality backyard putting green with an authentic sand trap may seem daunting. But with the right guidance, materials and some elbow grease, you can create your own private oasis perfect for daily golf practice.
This comprehensive DIY guide will take you through the entire process of building a backyard putting green from start to finish. Follow these tips and you’ll soon enjoy your own personal golf hole complete with hazards and challenges to improve your game.
Choosing the Optimal Location
The first step is deciding on the right spot in your yard for the putting green. Here are some factors to consider:
- Sunlight – At least 5-6 hours of direct sunlight daily is ideal. This encourages growth and avoids fungi.
- Drainage – Ensure no water collects on the surface. Slight slope and absorbing materials under the turf can help.
- Accessibility – Pick a spot near your home for convenience. Don’t forget a path to walk on.
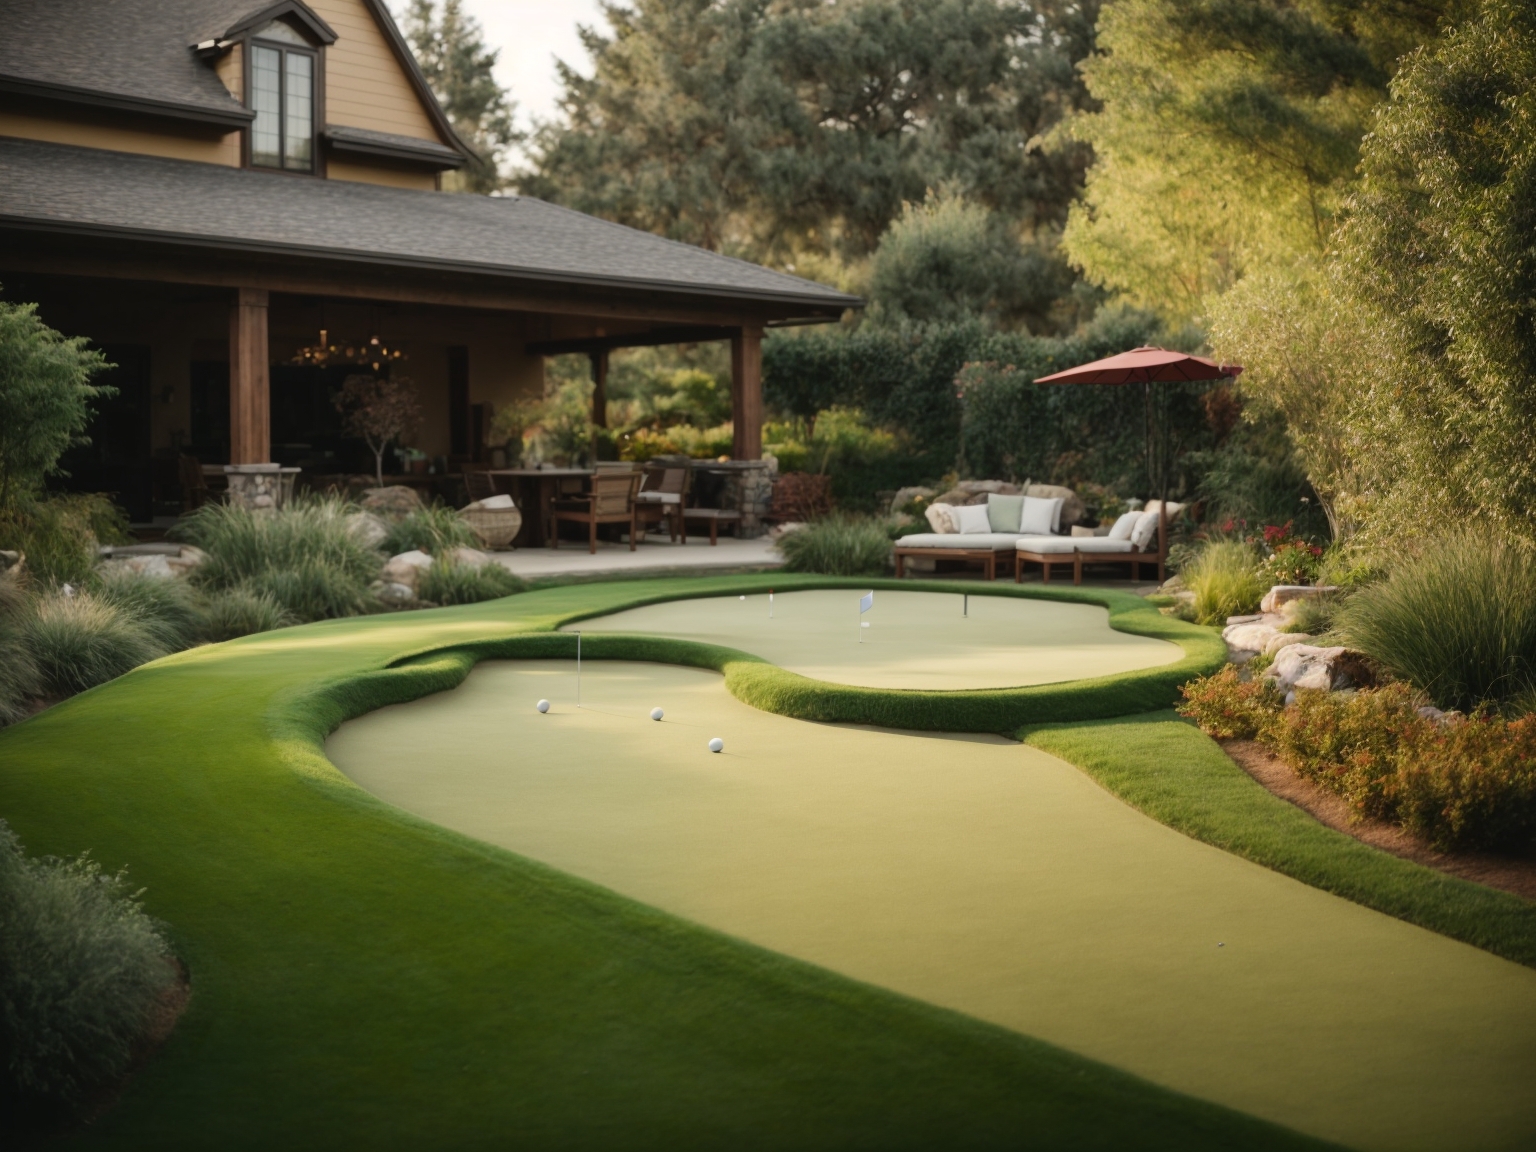
- Dimensions – A 10 x 15 feet area is a good start for hobby practice. Allow extra space for the sand trap.
- Obstacles – Incorporate trees, rocks, garden beds to make it more interesting.
Incorporating Sand Bunkers and Other Hazards
No backyard putting green is complete without hazards like sand bunkers and water traps. Here are some tips:
- Position the sand trap about 50% along an edge for visibility.
- Dimensions of 4 x 8 feet with 3-4 inch depth is sufficient for casual play.
- Use angular edges and bulkheads for an authentic hazard look.
- Add a water feature or garden bed with flowers/rocks to create obstacles.
- Ensure at least 10 feet of open turf around the trap for approach shots.
- Shape the overall green with gentle slopes and curves using sand underneath.
Selecting the Right Grass and Base Materials

Choosing quality turf and base materials ensures your putting green remains playable for years. Consider these options:
- Bentgrass – Fine-bladed turf ideal for smooth putting surfaces. Needs more maintenance.
- Bermudagrass – Coarse and hardy; handles heat well. Requires less care.
- Artificial turf – No maintenance but doesn’t provide an authentic feel.
- Sand base – At least 6 inches below the turf for drainage. Medium-grade, washed concrete sand is best.
- Gravel subsurface – 4-inch layer prevents compaction and promotes drainage.
- Topsoil – For growing natural grass. Get high-quality soil with additives.
- Geotextile membrane – Prevents erosion between turf and sub-layers.
Tools and Equipment Required
Assembling the right tools will make constructing your putting green much easier. Here’s what you’ll need:
- Shovel – For digging and moving soil, gravel and sand
- Rake – To smooth and level the materials
- Roller – Compacts the surface evenly
- Garden hose – To water new turf patches lightly
- Wheel barrow – For transporting soil, sand and gravel
- Landscaping tools – Edging, masonry and gardening tools to shape hazards
- Measuring tape – For marking dimensions accurately
- String and pegs – To outline the overall area
- Torpedo level – Ensures the surface is flat and smooth
Step-by-Step Instructions
Now comes the fun part! Follow these key steps to construct your own backyard putting green:
Prepare the Base
- Mark the area with string and pegs. Allow for an extra 2 feet on all sides.
- Dig down to remove turf and vegetation until you reach solid ground.
- Level the soil and lightly compact it to form a flat base.
- Add a 2-4 inch layer of gravel for drainage. Compact it down firmly.
- Cover with geotextile membrane to prevent erosion.
Install the Sand Base
- Pour at least 6 inches of sand over the gravel sub-base.
- Use a rake to spread it out evenly across the entire green.
- Compact the sand using a hand tamper or lawn roller.
- Check for flatness using a level and rectify any uneven areas.
- Leave 1 inch margin around the edges to hold the turf in place.
Lay the Artificial or Natural Turf
- For natural grass, add a thin layer of quality topsoil over the sand.
- Unroll the turf and ensure the edges align without gaps or overlaps.
- If using artificial turf, secure the edges with glue or lawn edging.
- For natural grass, water thoroughly once laid to help it take root.
Build the Sand Bunker
- Mark out the bunker placement and dimensions with string.
- Dig out the area to a depth of 3-4 inches. Create angles and edges.
- Install plastic or timber bulkheads to hold the sand in place.
- Fill with fine washed sand, mimicking a real bunker’s texture.
- Use a rake to create smooth contours and make sure sand is loose.
Final Touches
- Install a practice hole with a turf cup liner or build a wooden frame.
- Add obstacles like rocks, garden beds or mounds around the green.
- Shape and contour the overall green for natural slopes and rolls.
- Allow 1-2 weeks for natural grass to fully root before playing on it.
And that’s it! After following these DIY steps, you’ll have your own picturesque putting green ready for honing your short game. Time to get out the putter and get practicing!
Maintaining Your Backyard Putting Green
A well-built putting green requires some simple maintenance to keep it in top playing condition. Follow these tips:
- Watering – 1-1.5 inches per week. Adjust for weather and grass type.
- Mowing – Once a week during season. Set to 0.5 – 0.75 inch height.
- Rolling – Every 2 weeks using a light roller to smooth surface.
- Raking bunkers – Weekly, use a bamboo rake to comb sand back into place.
- Fertilizing – Apply balanced organic fertilizer monthly.
- Dethatching – Remove debris and aerify compacted areas.
- Topdressing – Add thin layer of sand twice a year to fill uneven spots.
- Edging – Neatly defining edges prevents stray growth.
Consistent care will keep your backyard putting green rolling smoothly for years of high-quality practice!
Cost Breakdown and Return on Investment
Constructing a top-notch backyard putting green requires an upfront investment, but one that pays off in the long run. Here’s a realistic budget to expect:
- Materials – Good quality turf, sand, gravel, soil etc. $1500 – $3000
- Tools – Shovels, rakes, rollers, etc. $350 – $600
- Professional installation (optional) – $2000 – $4000
Total for DIY – Around $2000 – $4000 depending on size and materials.
Total with installation – $4000 – $7000 for a professional quality green.
The price may seem steep, but having unlimited access to a private putting green has many benefits:
- Improves your golf skills with daily practice
- Saves money on range fees and green fees
- Provides convenience – practice anytime at home
- Adds aesthetic appeal to your backyard
- Provides entertainment for you, family and friends
- Increases your home’s value for resale
For passionate golfers, investing in a backyard putting green pays dividends for years to come!
Conclusion: Bring the Joy of Golf Home
Creating your own backyard putting green with sand trap takes effort, but the rewards are immense. Implementing these tips will allow you to construct a private golf haven right in your own yard.
With an inviting oasis to practice chip shots and lag putting after work, your golf game will reach new heights this season. No more struggling to find time to get to the driving range or crowded practice green.
The sense of pride and accomplishment from building it yourself makes sinking putts on your home turf even more satisfying. And the look of joy on your kids or grandkids’ faces when you introduce them to the game in your own backyard? Priceless.
So go ahead, bring the joy of golf home by crafting your own customized putting green. Just be prepared to be the envy of the neighborhood once your masterpiece comes together!
Frequently Asked Questions
What Type of Grass is Best for Putting Greens?
Bentgrass and Bermudagrass are ideal grasses for putting greens. Bentgrass provides a smooth, fast surface good for low shots. Bermudagrass withstands heat and requires less maintenance. Avoid artificial turf for an authentic putting experience.
How Deep Should the Sand Trap Be?
For a backyard putting green, construct the sand trap 3-4 inches deep. This provides enough sand to splash on bunker shots without requiring too much maintenance. Angle the edges to mimic real golf course bunkers.
How Much Room is Needed Around the Putting Green?
Allow at least 2 extra feet around the edges of the putting surface. This ensures you can make full approach shots and accommodate mowing. Plus it provides space to add obstacles like garden beds, trees or mounds.
Can I Maintain the Putting Green Myself?
Definitely! With basic tools and routine care like mowing, watering, and raking bunkers, you can easily maintain a high-quality putting green yourself. Dethatch and aerate periodically for longevity.
How Long Does It Take to Install a Backyard Putting Green?
With proper materials and tools, expect the DIY installation to take 2-3 full weekends at minimum for excavation, base preparation, and turf laying. Building hazards like bunkers adds time. Allow grass 1-2 weeks to fully root before playing.

- How Much Does a Riding Lawn Mower Weigh? - January 9, 2026
- Can You Park Cars in Your Backyard? - January 3, 2026
- Understanding Drone Overflights and Privacy Concerns - January 3, 2026