Give Your OUtdoor Space a Makeover: DIY Easy Backyard Ideas with Turf and Pavers
Giving your backyard a makeover may seem like an intimidating project, but with the right materials and techniques, it can be simpler than you think. Combining artificial turf and pavers is an increasingly popular DIY approach for creating a low-maintenance, aesthetically-pleasing outdoor living space. With some planning, budget-friendly choices, and step-by-step guidance, you can easily transform your yard into a sanctuary using our easy backyard ideas with turf and pavers.
Setting The Scene
Revitalizing your backyard is now more doable than ever using a DIY approach with turf and pavers. The transformative power of this dynamic duo lies in their durability, aesthetics, and ease of installation. With some simple planning, handy tips, and a can-do attitude, you can create a lush, inviting space perfect for relaxing or entertaining. This guide will walk you through the process, providing actionable insights to make your backyard vision a reality. Let’s explore the possibilities!
Why Choose Turf and Pavers?
Artificial turf and pavers make an ideal pairing for DIY backyard makeovers. Here are some of the biggest benefits this combination offers:
- Low Maintenance: Forget constant mowing, weeding, and watering. Durable artificial turf only needs occasional cleaning while pavers won’t crack or shift easily. This combo minimizes upkeep.
- Aesthetic Appeal: With realistic-looking artificial grass and stylish paver designs, you can create a magazine-worthy look and feel. Go for an elegant, uniform aesthetic or play with bold patterns.
- Durability: Properly installed turf and pavers can last for decades. They stand up well to foot traffic and elemental exposure better than natural grass or poured concrete.
- Customization: Mix and match shapes, materials, colors and textures when selecting pavers. Turf also comes in various blade lengths, hues, and even pet-friendly options. Personalize your space.
- Value Addition: Hardscaping and artificial lawns can increase a home’s worth by up to 20% by enhancing curb appeal. Plus you’ll get to enjoy the upgrades.
Clearly, artificial turf coupled with interlocking pavers offers huge advantages over grass and concrete. Let’s look at how you can integrate this combo into your own DIY backyard renovation.
Easy Planning Tips for Your DIY Project
Careful planning ensures your installation goes smoothly and your transformed yard functions as envisioned. Follow these tips before breaking ground on your turf and paver project:
Assess Your Space
- Measure the entire area you want to renovate and sketch your backyard on paper or digitally.
- Identify high traffic zones, drainage issues, sunlight patterns, and utility lines. Mark these appropriately on your sketch.
- Decide which sections should be artificial turf versus pavers based on functions. Entertainment spaces often benefit from pavers while play areas may warrant turf.
- Plan where features like planters, seating, fire pits or water features can go to enhance the space while allowing ample room for activities.
Set a Realistic Budget
- Research pricing for materials, rental equipment, and labor if outsourcing part of the work.
- Factor in costs for the sub-base, base layers, adhesives, join sands, and added features apart from just turf and pavers.
- Account for 10-15% extra for incidentals like damaged materials or tool rentals.
- Look for ways to trim expenses if needed without sacrificing quality. Sales, Craigslist finds, and DIY-ing portions can help.
With measurements and a budget in place, you’re ready to make this backyard makeover happen! Let’s look at installation specifics.
Simple Step-by-Step DIY Installation Guide
Now for the fun part – actual installation using our backyard ideas with turf and pavers! We’ll break this down into manageable sections to ensure your project results in an outdoor retreat you’ll enjoy for years.
Ground Preparation Made Easy
Proper ground prep lays the foundation for a successful installation. Here’s how to get it ready:
- Clear the area completely – remove all plants, rocks, debris. An eco-friendly weed killer can eliminate unwanted vegetation.
- Rent equipment like a skid steer loader or rototiller to scrape off grass and churn the top 2 inches of soil.
- Grade the area with a rake, adding soil as needed to fill low spots and level any uneven sections. Compact the soil.
- Optional: Put down landscape fabric to inhibit weed growth before adding the sub-base layer.
With the blank slate prepped, you’re ready for turf and paver materials.
Laying Turf Without Hassles
Follow this streamlined process for putting down your artificial turf:
- Choose quality turf designed for landscapes and made with UV-resistant polyethylene blades. Optimal blade length is 1.5-2 inches.
- Clear the turf sub-base area of any debris. Rake smooth.
- Optional: Cover with a 2-3 inch crush and run gravel sub-base for drainage, topped with a thin sand layer to anchor the turf.
- Unroll your turf, following the grain. Stretch tight to avoid ripples.
- Use carpet tape, staples or stakes to secure every few feet along seams and edges. Do not glue down your turf.
- Fill turf seams with sand infill, brushing to match blade direction. Evenly infill the entire area about 1-1.5 lbs./sq.ft.
- Irrigate thoroughly to settle materials. Your turf is ready for playtime, pets, and parties!
With lush turf installed, now just add the perfect paver path or patio.
Paver Installation: Quick Tips
Follow this streamlined process for installing your pavers:
- Choose quality pavers suited for your climate. Concrete, clay, and natural stone are popular options.
- Layout pavers on the prepared 4-6 inch gravel base layer. Use stakes with masonry string to map out curved designs.
- Ensure proper drainage slopes of 1/8 inch per foot. Use a tamper to level the pavers across the base.
- Fill gaps between pavers with polymeric sand. Sweep gently to fill. Mist to settle sand before sealing gaps.
- Compact installed pavers with a plate compactor. Check for levelness and fill any gaps created.
Your DIY turf and paver installation is complete! But some regular maintenance will keep it looking fabulous.
Easy Maintenance for Longevity
- Remove leaves, debris, and weeds from turf and between pavers using a stiff broom or power washer.
- Replenish joint / infill sands on pavers and turf as needed if erosion occurs.
- Pavers may require yearly sealing or staining depending on climate. Follow manufacturer guidelines.
- In snowy regions, use a plastic shovel on pavers and rake turf gently to avoid damage.
With just a bit of seasonal care, your turf and paver surfaces will stay pristine for decades to come!
Quick and Easy Design Inspirations
If you need some inspiration for ways to incorporate pavers and turf creatively, here are a few stylish ideas:
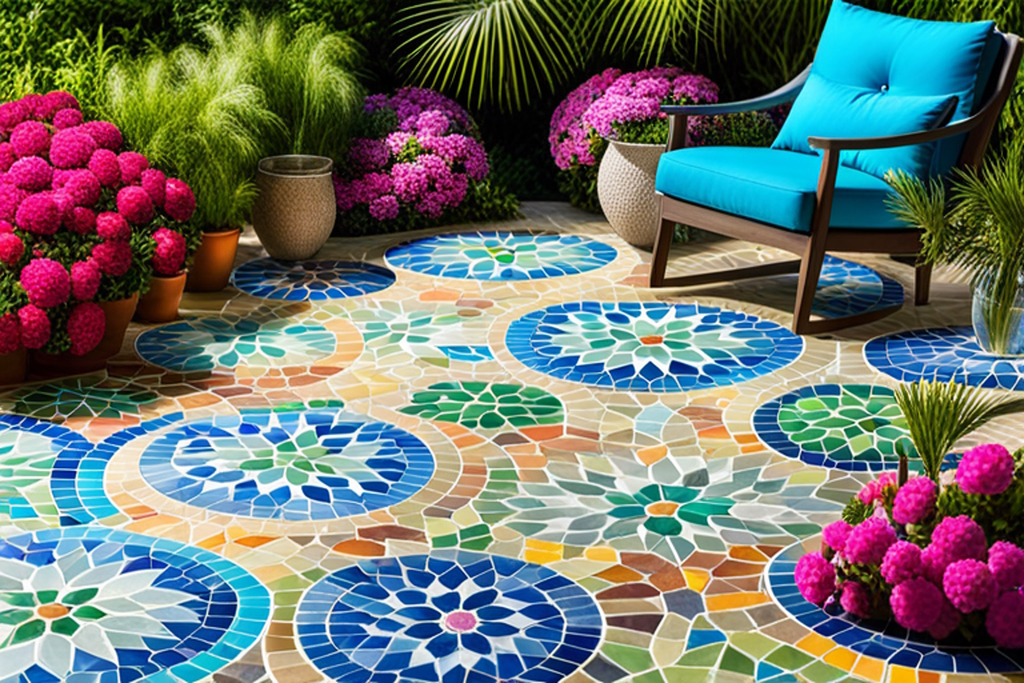
Simple Patterns for Maximum Impact
- Try a mosaic or geometric design like a zig-zag, diamond, or circular pattern using one or more paver colors and textures.
- Create “waves” in your turf by cutting curved edges and complement with a freeform paver walkway.
- Make a bold statement with paver compass, starburst or cube designs contrasting with emerald turf.
Combining Elements for Multi-functionality
- Add a paver dining area next to a BBQ grill and continue the pattern out to a firepit gathering space.
- Use pavers for bench or bar foundations then surround with turf for play areas or conversation pits.
- Brighten up nighttime gatherings around a firepit or dining zone with path lighting built into paver edges.
Hassle-free Special Features
- On a sloped yard, create multi-level terraces with short retaining walls and connect with winding paver steps.
- Turn an uneven backyard into a yoga paradise with flat artificial turf surrounded by natural flagstone meditation paths.
Let your personality shine through in the design but keep the foundations for success – durable turf and pavers suited for the space and climate.
Avoiding Common DIY Pitfalls
While a DIY project with turf and pavers may seem straightforward, it’s important to avoid some common pitfalls that can shortchange your finished product:
- Buying cheap materials that won’t last or look realistic. Get samples beforehand and read reviews.
- Attempting to install turf or pavers over contaminated soil or without gravel sub-bases. Proper prep is crucial.
- Not leveling the ground enough prior to installation. This causes shifting or rippling later on.
- Neglecting proper drainage. Ensure sufficient grading and subsurface permeability.
- Leaving gaps between pavers or seams in turf allows erosion and weeds to take hold quickly.
- Rushing! Read instructions thoroughly, watch tutorial videos, and take your time with good tools. Don’t cut corners.
Patience and diligence ensures your DIY turf and paver project looks professionally done and performs for decades with minimal upkeep required.
Budgeting Your DIY Project: Getting the Most Value
Creating your ideal outdoor living environment is within your reach. Here are tips for maximizing value from your turf and paver investment:
Buy materials in bulk: Purchasing turf, pavers, and other supplies in larger quantities often costs significantly less per square foot. Split bulk orders with neighbors doing projects.
DIY the labor: Doing the ground prep, turf installation, paver layout and more yourself saves thousands in contractor fees. Watch online tutorials.
Rent equipment: Tools like compactors, tillers, and excavators can be rented affordably short-term instead of buying outright. Shop rental rates.
Mix styles strategically: Using higher-end pavers in central entertaining spaces and more affordable options in lower-traffic areas balances cost.
Work in phases: Tackle the backyard in sections over 2-3 years if needed. Phase 1 could be just turf. Phase 2 adds a paver patio. This breaks up expenses.
With smart planning, you can create a beautiful DIY backyard oasis that feels like a million bucks without the price tag!
FAQs for the DIY Enthusiast
Before beginning your turf and paver project, you likely have some questions. Here are answers to some commonly asked DIY queries:
How long does installation take? Expect installing approximately 400 sq. ft. of both pavers and turf to take 2-5 days working solo. Renting equipment and having an extra set of hands expedites the process.
What’s the best time of year for installation? Late spring to early fall is ideal as you avoid extreme heat or freeze/thaw cycles that can disrupt bedding layers.
Should I use plastic or fabric beneath pavers? Landscape fabric is preferred as it prevents weeds but still allows drainage. Plastic vapor barriers trap moisture and are not recommended.
How thick should my paver base be? 4 to 6 inches of crushed stone topped with 1 inch of sand is typical for a solid base that facilitates drainage.
Can I install turf on a sloped yard? Yes, provided the slope is less than 30%. Stake turf securely in place until the infill weights it down.
Feel free to reach out for any other questions! We hope this guide provided the insights you need to make your turf and paver backyard dreams come true using DIY methods. Time to get started!
Conclusion
You now have all the tools you need to tackle a DIY backyard renovation with confidence. Combining durable, lush artificial turf with elegant, functional interlocking pavers allows you to create an inviting outdoor sanctuary tailored to your tastes. With some diligent planning, budgeting, and elbow grease, you can transform your yard into a personalized refuge.
We hope this guide illuminated the possibilities and provided practical tips to empower your turf and paver project. Don’t be intimidated by the DIY approach – with the right guidance, constructing your ideal backyard is very achievable. The process of designing this unique, hand-crafted space will be deeply satisfying. Soon you’ll be hosting barbeques, enjoying sunsets, and relaxing in your own backyard paradise. Time to get started – happy DIY-ing!
Further Reading
- DIY Paver & Artificial Turf Patio
- 10 Cheap Backyard Ideas: No Grass Backyard Landscaping Options
- How to Give Small Backyards a Full Makeover With the Best Artificial Turf
- The 2021 #ShowEmYourDIY: 22 DIY Ideas to Transform Your Sad Backyard Into Your Favorite Place

- How Much Does a Riding Lawn Mower Weigh? - January 9, 2026
- Can You Park Cars in Your Backyard? - January 3, 2026
- Understanding Drone Overflights and Privacy Concerns - January 3, 2026